Social Media Images

  • Copyright Free Images: 20+ Resources You Need to Know

    Looking to find copyright free images to use in your blogs, websites or social media posts? The following sites are the best on the internet.

    Do you frequently share images online? If so, it’s essential to have a virtual Rolodex of go-to websites to quickly find images. It’s also important that you have websites in which the legal restrictions are clear and concise.

    Below you will find my go-to list of the best sources, hand-picked and vetted to a strict set of standards. I’ve included some of my favorite paid resources as well.

    I update this post regularly with new resources. If you want to be notified when something new is added, be sure to subscribe to my Insiders list by adding your email below.

    Join the Insiders List

    My Insiders get first access to new and updated resources as soon as they’re available. They also are the first to hear about any new projects I’m working on. Add your email below to join!

    Copyright Free Images Galore

    The following sites are the best places I’ve found online to get royalty free images. I have sorted through dozens of sites to bring you the best of the best. This will save you time and potential frustration.

    You shouldn’t have to spend an hour and a half looking for the perfect image for your next epic blog post. These sites I’ve listed had to pass a certain number of criteria:

    1. Great selection of images
    2. High-quality photography
    3. Copyright free or CC0 licensed
    4. Great search functionality
    5. Easy to navigate quickly
    6. Safe for work (and kids)

    Each site I list below will pass all of these criteria with flying colors.

    About Copyright Free and CC0 Images

    It’s important to note that the most important aspect is the copyright free or CC0 criteria. In case you’re not familiar with these terms, I wanted to explain them a bit.

    When photographers upload their images to the internet, they are the copyright owner. They have certain enforceable rights that protect people from using their photos without their permission. If you are found using their copyrighted photography without permission, they can take legal action against you or your business.

    A photo that is labeld “CC0” (Creative Commons Zero) means that the original photographer has willingly waived their copyright to it. That image is free to use for personal and commercial use. You don’t need to pay royalties, give attribution, or get permission.

    Just because an image is marked “copyright free” doesn’t necessarily mean it’s 100% free to use. Some may require you to give attribution or pay a small fee.

    Without further ado, here is my go-to list of copyright free image sites.

    Unsplash

    This was a small free photo project that turned into an absolute behemoth of a website. It is now one of the most popular sites on the internet. Unsplash is home to more copyright free photos than you could even know what to do with.

    Unsplash started as a simple Tumblr site posting 10 new photos every 10 days. It has turned into a place where you could spend hours and never need to go elsewhere for your image hunting.

    Photographers upload their work to Unsplash where a team of editors review each submission. If the photo passes their high standards, the photo is made available. Photographers also can have profiles on Unsplash, which is a great incentive for them to upload their best work.

    Attribution is not required for using Unsplash images, but they do encourage it.

    Image restrictions: CC0

    Burst (by Shopify)

    The site is laid out beautifully. Burst give you the ability to sort through new photos, popular collections, or perform a search for specific image keywords.

    Shopify claims they are uploading new photos to the site every week. A big improvement from when they first launched with new photos every couple of weeks.

    It is targeted at entrepreneurs and business owners looking for stock photography, but certainly, anyone can use them.

    Image restrictions: CC0

    Pexels

    Pexels began as an aggregator of copyright free photos from other sites. They abandoned that model and instead created their own library of images like Unsplash.

    They are now my second favorite place to find images. The majority of the photography on Pexels is very high-quality. They have a similar approval process for photography submitted on the site.

    It’s easy to search, updates with new photos daily and has a very large library.

    Image restrictions: CC0

    Reshot

    Simple and elegant looking website, with a good search function that points to well tagged images.

    What’s interesting though, is their “Quick Image Packs” where you can download a set number of images that revolve around a certain theme.

    All they require for you to download these image packs is to Tweet about the site. This action is made easy by a “Tweet to Download” button on the pack you want to get.

    Current packs available are:

    • Diversity Matters Pack
    • Active Lifestyle Pack
    • Everyday Technology Pack
    • Flat Lay Pack

    I hope they add to their packs as this is a really great concept, and something I find myself needing more and more.

    Image restrictions: CC0

    Libre Stock

    If you’d like a centralized place, much like Pexels, to search all the best free image sites using an intelligent tagging system.

    The search engine is powerful. When you click on an image in the search results you are taken to the photo on the site it originated from.

    Image restrictions: CC0 (but be sure to check the site you’re downloading from)

    PicJumbo

    A project of Viktor Hanacek, designer, who understands the importance of high quality images in a designer’s life. New photos are uploaded daily.

    Fantastic work, and completely copyright free. There is a paid membership for $6/month if you want even more from Viktor.

    Image restrictions: CC0

    Barn Images

    A relatively new resource, this site is owned and operated by two photographers who set out “with the hope of redefining traditional stock imagery.” They publish new, free photos every weekday and are dedicated to high quality, non-stock images.

    Despite the name, the site is not dedicated to images of barns. It has a vast diversity of fresh, high-quality images that are great for use with your website, blog or social media projects.

    Images restrictions: None

    Gratisography

    A personal project of Ryan McGuire of Bells Design. Very beautiful high-resolution images added weekly, completely free of copyright.

    What I like most about this site is the personality and uniqueness of the photographer’s style. Very fun and a tad bit quirky.

    Image restrictions: CC0

    Pixabay

    A collection of images that are personally uploaded by contributors under Creative Commons Public Domain. The site functions beautifully and has great navigation, sorting, and searching functions.

    One of the features I like about Pixabay is the ability to filter your searches by landscape or portrait images. This is helpful when you’re looking for a very specific image orientation.

    Image restrictions: CC0

    Compfight

    Compfight allows you to search through Flickr’s Creative Commons listed photos. It’s pretty simple to use and will automatically generate the HTML code to insert photo credit.

    It can be a bit buggy sometimes, so you may be better off going straight to Flickr.com. Once there you can do an advanced search for Creative Commons photos.

    Image restrictions: Depends

    Morguefile

    This is a big searchable database of free images. It also has some great filtering options to really find the photos you’re looking for.

    Image restrictions: CC0

    New Old Stock

    Another Tumblr powered site, New Old Stock features “vintage photos from public archives”. A great place to find authentically vintage looking imagery.

    Image restrictions: Public Domain

    Death to the Stock Photo

    Their mission is to “make the internet more beautiful”. This is an email subscription that sends you free curated photo packs every month.

    They also do the occasional paid pack that is usually from a trip they are taking. Their photography is always top notch.

    Image restrictions: Limited (but more than fair)

    Jay Mantri

    Yet another Tumblr based photo archive. I recently discovered this site and love the creator’s style.

    No notes about how often he updates it but his only request is that you “make magic” with them.

    Image restrictions: CC0

    Kaboompics

    Also newly discovered, I found this site to be easy to search and photos are well tagged, much like on Pexels.

    Image restrictions: CC0

    Albumarium

    Now here’s a site with a very interesting take on the world of free images. All images are organized into albums (hence the name Albumarium). Instead of searching for photos, you search for albums.

    This is very helpful for when you’re looking for more than one image under the same theme. Let’s say you need 3-4 photos that need to look like they were taken by the same person. Or maybe you want them to look like they were taken in the same setting. Albumarium is exactly what you need.

    Other sites offer a similar “packs” model, but most of those are paid only.

    Image restrictions: CC2.0

    Life of Pix

    Very simple site, updated regularly with new high-resolution images that are free to use and share. The search function works well, but I’d love to see the search function work with the grid layout. As of now, when you search you only get one-column results and that can be a bit tedious.

    Image restrictions: CC0

    Paid Stock Images

    If you really want to ensure your image hunting is legal and time-efficient, you can always utilize one of the many stock image sites. These are sites that offer royalty free stock photos for purchase.

    This is the best solution if you have a professional blog and you want the highest quality selection without any potential legal issues.

    Shutterstock

    Shutterstock boasts an insane amount of royalty free images that you can purchase for a good price. They also have a wide variety of illustrations, graphics, and icons you can choose from as well.

    A noteworthy feature is their Shutterstock Editor Pro image editor. It is perfect for those who want to create quick image edits for various purposes. You can make the edits right inside the web app before downloading.

    Super convenient.

    The good folks of Shutterstock have also partnered with me here at Dustn.tv, allowing me to have generous access to 25 downloads per day. This partnership had no effect on their placement in this article. (They didn’t even ask to be mentioned.)

    iStockPhoto

    iStockPhoto is the leading stock image site on the internet. They have a huge selection of royalty free images for purchase. But don’t let that intimidate you because their search filtering options make it pretty easy to narrow down your searches.

    Their downside is that they use a credit system as opposed to a straight dollar amount. This makes calculating costs a bit more difficult.

    Photo Dune

    Not quite as big of a selection as iStockPhoto but they are my personal preference. I prefer them because the payment system is in dollars rather than credits, so you know exactly how much you’re paying for each photo.

    Social Media Images + Graphics: SoVisual.co

    If you’re a social media manager, you’ll want to take a look at SoVisual.co. It is not a library of individual photos like all the other sites. Instead it offers bundles of social media graphics for purchase.

    Because let’s face it–most of you reading this blog post are sourcing images to use on social media. And what do you have to do once you find them? You have to pull them into a graphic design app and take the time to design something.

    SoVisual.co saves you tons of time in that aspect.

    Each bundle or “Social Pack” comes with 30 days of social media images and content. Each day has one graphic in four different sizes. Additionally, each size has both a version with text, and without text so you can truly get the most out of every post.

    This makes creating a consistent content calendar as easy as possible. And I must say (as a completely biased founder) I think these packs are pretty stellar.

    Lightstock

    Some of the highest quality Christian photography you will find on the internet. Period.

    The prices aren’t cheap, but neither is the quality of the photos. If you’re looking for the best premium quality Christian-oriented photography, this is the place to go.

    Enough free photo sites?

    This list is constantly updated, and I only add the best of the best copyright free image sites to this list.

    So if you have something that isn’t mentioned in this list, let me know in the comments below. I will review and consider your suggestion, but I don’t promise all of them will make it.

    Do you have any free image resources that you would add to the list? You can leave a comment by clicking here.

  • Social Media Cover Photo Templates for the Most Popular Social Networks

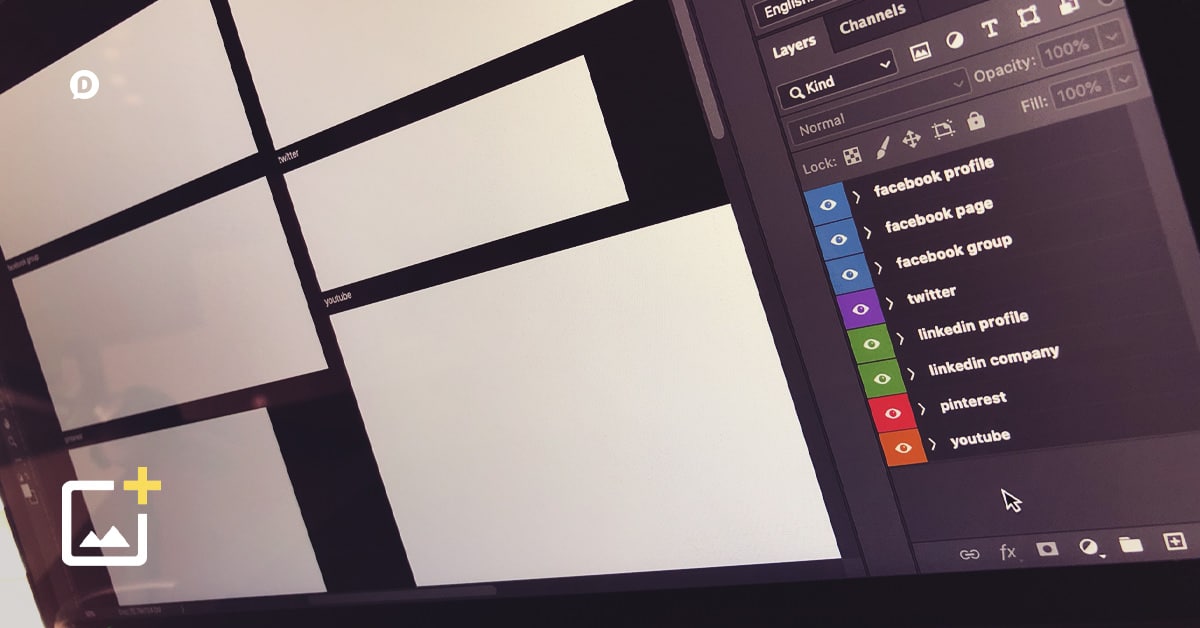
    Your one-stop resource for always-updated cover photo sizes (and templates) for Facebook profiles, Facebook Pages, Facebook Groups, Twitter, LinkedIn, Pinterest and YouTube.

    Social media is becoming more and more visual every day. Ever since Facebook revealed its timeline cover photo, people have really taken to it this idea of a large header and/or cover images.

    It’s a lot of work though to create a good cover photo for your profile– especially when the dimensions for these cover photos are so hard to find. Well, you’re in luck! I’ve gathered the cover photo dimensions from the top social networks that incorporate them, and put them all in one place for you.

    I also promise to always stay on top of social network changes, and update these templates accordingly.

    Download all JPEG templates instantly by adding your email below!

    The primary social networks that I have included for you to download are as follows [click to go straight to that template]:

    Each template showcases the maximum display dimensions. I’ve also marked out where certain interface obstructions or cropping may occur. The grey areas are what will be seen, the dark areas are what will be covered up.

    Make sense? Cool, let’s get started.

    A Brief Word of Advice

    One thing I tell all my clients when crafting these for them is that they should not look at it as a billboard or a marketing opportunity. It should be used to showcase the person or brand– not to sell something. It is a means of visually enriching your online story.

    Too much text is unattractive and people won’t read it anyways. Trying to communicate too much ends up communicating nothing at all. So keep your cover photos high-quality and simple.

    Lastly, I always recommend that you keep your cover photos consistent across all your social profiles. They don’t have to be the exact same photo, but consistency builds brand recognition and trust. Just something to keep in mind.

    Facebook Cover Photo Template (Profile)

    facebook profile cover photo template

    Over the years there have been a lot of changes to the many Facebook image sizes. Currently, your Facebook profile cover photo is a maximum resolution of 2,048×758.

    Make sure you look out for the areas that will be covered up by your profile picture, your name, and a row of action buttons. While these obstructions are annoying at times, you can also get creative and make them a part of your background if you want.

    For example:

    Notice how the profile photo is seamlessly a part of the cover photo. Very creative.

    Facebook Cover Photo Template (Page)

    facebook page cover photo template

    If you have a Facebook Page, your cover photo gives you 100% of the space to work with. The maximum display dimensions are 2,048×779.

    There are no interface elements or obstructions of any kind.

    Just keep in mind that your Facebook Page Cover Photo is not a flyer. It’s also not a billboard. Don’t try and put a ton of information all over it because people don’t want to sit and read through it.

    Use your Cover Photo to showcase your brand as visually as you can with color, photography, and/or illustrations that show your audience what your about without using words.

    Facebook Group Cover Photo Template

    facebook group cover photo template

    If you manage a Facebook Group, the Cover Photo is also unobstructed. You have 2,048×830 to tell the visual story of your group.

    Since groups tend to get a lot more visits than a Facebook page, the group Cover is something you might consider updating frequently to showcase updates or upcoming events for the community.

    Twitter Header Template

    twitter header template

    Since the day it was introduced, the Twitter Header has not changed it’s dimensions. It still sits at a maximum resolution of 1,500×500.

    Like your Facebook profile, there is an obstruction to be aware of from your profile photo. It’s a much smaller area than Facebook’s photo obstruction, but still enough to have some fun with if you want.

    LinkedIn Background Image Template (Profile)

    linkedin profile background image template

    If you want to pretty-up your LinkedIn Profile, the background image is a nice touch. You have a very narrow area, however, maxing out at a resolution of 1,584×396.

    Since LinkedIn is a more professional environment, I highly recommend keeping your Background Image a photo or illustration. Leave the text off of it–especially since it’s such a small area to work with.

    Just like Twitter, LinkedIn also places your profile photo over top of a portion of the Background Image.

    LinkedIn Background Image Template (Company)

    linkedin company background image template

    If you manage a LinkedIn Company Page, you also have the ability to upload a Background Image. The maximum display resolution is 1,536×768.

    This maximum resolution is deceiving, however, as most of it ends up getting cropped out. There is only a very narrow sliver of the uploaded photo that will actually display.

    On top of that, there is also a portion of the Background Image covered by your company profile photo. Yikes!

    I have no idea why LinkedIn decided to make this so complicated. I’m hoping it changes soon so it doesn’t feel like so much of our photo is wasted.

    Pinterest Cover Photo Template

    pinterest cover photo template

    Pinterest was one of the last big platforms to allow for a cover photo. You can upload one for yourself at a maximum resolution of 1,600×900.

    Again, a small portion of the photo will be covered up by your profile photo.

    If you choose not to upload a cover photo, Pinterest populates a dynamic one which displays your latest pins. I think this was a brilliant (and beautiful) move by the Pinterest team.

    YouTube Channel Art Template

    youtube channel art template

    Now we come to the last, and most complicated of all the social media cover photos-the YouTube Channel Art.

    YouTube requires you to upload a photo with a minimum resolution of 2,560×1,440. You can upload one that is larger, but it will get reduced in size (and quality).

    The challenge with YouTube Channel Art is that there are 3 different display possibilities–Desktop, Mobile, and TV. Each of the 3 display environments will show your Channel Art in a different crop.

    In my template above, the white area is what will be displayed on most mobile screens. The extended grey areas to the left and right of that white area is the additional space that will be seen on desktop, laptop, or some tablet devices.

    Everything else is what will be seen when your YouTube channel has gotten so popular that people are browsing it from their television set. And even then… I have no idea how they would even see your channel art.

    Quick Reference Infographic

    In case you need a quick reference guide, I’ve put this simple infographic together so you can get all these dimensions at a glance. Simple, lite, effective, and highly sharable.

    Share this Image On Your Site

    Copy the code below and paste it into your website!

    <a href="https://dustinstout.com/social-covers/"><img src="https://dustinstout.com/free-resources/social-covers/social-cover-templates-reference.jpg" alt="Social Media Cover Photo Templates" width="600px" border="0"/></a><em>Image courtesy of <a href="https://dustinstout.com">dustinstout.com</a></em>

    You can save each one of the photos above and use them at your leisure. Of course proper credit is appreciated, but not required. Make your cover photos beautiful, be creative, and always have fun.

    What are some of the best cover photos you’ve seen online? You can leave a comment by clicking here.

  • Instagram Image Sizes and Dimensions 2024: Everything You Need to Know

    What are all the Instagram photo sizes and dimensions you need to know for 2024? How about Instagram video resolution and size ratios? Sit back and relax, because this post has it all covered.

    After plenty of years of only standard square images and videos, Instagram opened up their platform to allow for portrait and landscape orientations. What?! That’s right! Life just got a little bit sweeter. These new Instagram sizes are a huge deal!

    While most users don’t really care about their Instagram picture size, for those of us using Social Media to grow our business or brand, this makes repurposing content a lot easier. On top of that, the added variety makes Instagram a lot more interesting, more appealing, and more of a competitor to other platforms that we use.

    First of all, I am personally excited about this development. In the past, I have felt constrained by the limitations of the standard square option and this change will affect the way I personally use Instagram.

    So like usual, as soon as this Instagram change was live, I went to work dissecting and analyzing it to make sure I understand all the angles. Here is what I found…

    Bonus: Are you in a hurry? Just grab my downloadable Instagram Image Templates at the bottom of this page.

    The New Instagram Sizes

    Just like my social media image templates, Instagram now has 3 image orientations:

    • Square
    • Landscape (horizontal)
    • Portrait (vertical)
    • Story (also vertical)

    These 4 image orientations allow for greater versatility in creating all of your images. That is always a good thing, but it also means that you have to understand the constraints that are given.

    Don’t worry though. Like I said, I went to work picking everything apart so you don’t have to. Keep reading to get the scoop.

    Downloadable Templates

    As I have consistently done in the past with my social media image templates, I’ve gone ahead and created a template for those of us looking to create custom graphics for Instagram. Feel free to add your email below and you can download my templates for free!

    Download the Instagram Image Templates

    Just enter your email and the download link will be sent straight to your inbox. You’ll also be added to our email list and be the first to hear when new resources are available.

    The templates include all of the sizes noted in the infographic at the bottom of this post. Use them as a starting point (like a blueprint) for all of your custom Instagram graphics.

    Related: Get all the templates you need with my Facebook Image Sizes: Everything You Need to Know article.

    Square Photos and Videos

    The standard square image on Instagram remains to be shown at a maximum of 600×600 pixels. This has been pretty much the same since day one.

    It should be noted though that Instagram stores a version as large as 1080×1080 pixels. However, even on the largest of screens it seems they still display a maximum of 600×600.

    My highest recommendation is to create images that are a minimum of 1080×1080 as they will give you the highest resolution asset for reuse on other platforms. Additionally, as more and more screens become higher in their pixel density, you will be future-proofing your images from being too small.

    It’s also worth noting that square video has been found to be the most successful video size ratio across social networks.

    Landscape Photos and video

    This is another test… just move along here folks.

    A post shared by Dustin W. Stout (@dustinwstout) on

    For Instagram landscape images, the smallest I have tested on was at 1920×1080 which Instagram then displayed at 600×337. As it turns out, though, Instagram ended up storing a version that is 1080×607.

    So the trend here is that no matter what size image you upload, Instagram is resizing it to a maximum width of 1080px and displaying a version with a maximum width of 600px.

    Landscape videos also have a maximum display size of 600×336.5 (or 1200×673 in full view or retina display). This is very close to a typical 16:9 ratio that we see as the current cinematic standard in film & television.

    Portrait Photos & “Vertical” Video

    Vertical images (or portrait) will display at a maximum of 480×600 (or 960×1200 for retina display). However it looks like Instagram is storing the photos at a maximum of 1080×1350 on its servers. The aspect ratio is 4:5.

    This is a pretty standard aspect ratio for photography, but video is a completely different animal.

    Vertical videos on Instagram are roughly the same aspect ratio as vertical images. While the exact pixel resolution is a bit off, it’s not enough for anyone to notice. So when uploading a vertical video, just make sure it’s a 4:5 aspect ratio.

    It’s not a pretty adjustment to make if you’re used to shooting 16:9 video, but for the added screen real estate you get, I think it’s definitely worth it.

    Instagram Stories Size

    Instagram Stories has ultimately been a wild success. Although it’s basically a Snapchat clone, people have taken to it like wildfire.

    As such, once Instagram released the ability to upload images to your Stories, people started getting very creative with the graphics they used in them. Now, the problem with this is that the dimensions are dependent on the device that the Story is being viewed on. So this makes it rather difficult to standardize.

    However, my highest recommendation is to take a portrait 9:16 ratio approach (a.k.a. landscape 16:9 rotated 90 degrees). In pixels that would mean 1080×1920. As long as you give enough whitespace around the edges, you should be fine.

    IGTV Video Resolution

    When Instagram introduced its new video-centric app, IGTV, it was met with both excitement and skepticism. For a brief moment, however, it was a very exciting new direction for Instagram.

    Videos on IGTV show only in portrait orientation. So a 9:16 aspect ratio is ideal. This means your videos need to be a minimum of 1080×1920 resolution.

    With the excitement around IGTV fading, Instagram decided to start showing previews of your IGTV videos in the main feed.

    They looked like all other video inside the Instagram feed, but had a small message in the bottom-left corner, “Watch full IGTV video.” After a few seconds, this message shrinks down into just being an IGTV icon.

    The other small caveat is that these IGTV videos will only show 60-seconds of the full video, forcing you to click the icon to view the full video.

    What this signaled is that Instagram wants IGTV to continue to grow, and they’re willing to disrupt their main app experience to make it happen.

    So, naturally, since a 9:16 ratio video won’t work in the feed interface, there is a bit of cropping that happens when an IGTV video is displayed.

    When an IGTV video is shown in the main Instagram feed, it is cropped to the same 4:5 aspect ratio as portrait photos and videos uploaded natively.

    This means your 1080×1920 resolution video gets cropped at the top and bottom and becomes a 1080×1350 resolution video.

    I’ve added this video template to my download package for your convenience.

    What does this mean for Instagram?

    Personally, I think you’re going to see two kinds of users: the traditional and the people who like new things.

    The traditional users will stick to their square photos and be fine with that. They have gotten used to it and want to maintain their purist culture.

    The people who like new things will embrace these new dimensions and create a more diverse stream of visual content. Things will definitely be a bit more interesting.

    If I were to bet, I would say that much like Pinterest we will see the taller images and videos (portrait) getting much more love than the square or (especially) landscape photos. The reason for this is that Instagram is still a mobile network, by a long shot.

    Being a mobile dominated network this means that people’s habit of holding their phone in portrait will give the portrait images/videos a much better viewing experience. They will naturally cover more screen real estate garnering more attention.

    So don’t be surprised if you see me update my Social Media Image Templates soon to include a new template or two. Be sure you’re subscribed to my Insiders list to make sure you’re notified when they’re updated.

    Bonus: Instagram Sizes Infographic & Templates

    Ultimately it is a wonderful thing that Instagram is switching things up by providing more options for users. I think it is a change for the better and reveals a lot about how Instagram listens to its users. They not only listen but deliver.

    Because you read all the way to the end of the post (Woohoo!), I wanted to thank you (for real) by giving you this easy reference infographic of all the Instagram sizes.

    Use it as a guide for when you’re creating images for Instagram from outside of Instagram so you can pull them in without worrying about cropping.

    And FYI, you can easily save this in Pinterest by hitting the Pin button floating on this page. 😉

    Use This Image On Your Site

    Simply copy the code below and paste it into your website to share it with your readers.

    <a href="https://dustinstout.com/instagram-sizes/"><img src="https://dustinstout.com/free-resources/instagram-sizes-infographic.jpg" alt="Instagram Image Sizes" width="600px" border="0" /></a><br />Image courtesy of <a href="https://dustinstout.com" title="Dustin Stout | Social Media Resources and Insights">Dustin W. Stout</a>
    

    Lastly, just in case you missed it, don’t forget to download my free templates before you leave. They’ll give you easy access to the latest dimensions and blueprints to create great imagery.

    Save Time With Ready-Made Instagram Posts

    Many of you reading this are probably capable of creating your own Instagram images. And that’s totally fine.

    But some of you just don’t have the time. You’re thinking,

    These templates are great! Now, if I could only find the time to create a bunch of perfectly sized Instagram content…

    And I feel your pain. Running a business, an agency, and all the demands of a typical day make it hard to find time to create content.

    That’s why I created SoVisual.co—for those of you who want great Instagram content, but don’t always have the time to create it yourself.

    Our huge library of customizable templates are fast and easy to customize. And we’ve also created “collections” of designs which allow you to create multiple pieces of content with similar styles giving a unified look.

    Just pick a template, fill in the fields, and click “Create.” It’s as easy as that.

    So what are your thoughts about Instagram’s various post sizes? You can leave a comment by clicking here.

  • Social Media Icons: Free and Always Updated

    The most meticulously updated and accurately crafted minimal social media icons on the internet. Now includes the newest Facebook icon!

    The most recent update to the icon set includes six updated icons as well as four completely new additions. But first, some backstory…

    I have a pet peeve.

    Okay fine, I’ve got more than one of them.

    One in particular has to do with social media icons. It may be silly, but I just can’t stand seeing outdated social media icons. It bothers me–and I’ll talk about why it should bother you as well further in this post.

    So, in an attempt to save the world from outdated social media icons I’ve created my own social media icon set and you can download them for free!

    Not only that, but I’ve not got a bonus set of icons thanks to my friends over at Vecteezy who have created an additional set of social media-related icons just for my audience. And they’re all one-hundred percent free!

    How cool is that?

    So before I give you the goods, allow me to explain why this is actually such a big deal if you’re trying to make your mark online.

    Why Updated Social Media Icons Matter

    In a world where visual appeal is associated with authority and credibility, it never ceases to amaze me how many times I come upon outdated, ugly social media icons.

    This is what I refer to as an “icontastrophe.”

    I’ve stated before how important it is to make your social media presence prominent. Your readers, customers, fans, and followers need to know that you are active on the social networks they would follow you on.

    What kind of impression do you think it makes when you’re using social icons that have been retired? Let me give you a few typical opinions:

    • You’re outdated
    • You’re not paying attention
    • You’re irrelevant
    • You’re not really active on the platform

    While this may or may not be true, the impression that it gives is negative. No matter how awesome you are on those platforms, a savvy user (the people you want on your side) will recognize an outdated icon right away.

    “Trust increases when we get the details right. Customers judge online credibility by evaluating the visual design, copywriting, and interactions. If trust matters to your business, then design details should matter too.” Braden Kowitz

    Here are a few examples from real life outdated social media icons:

    Now, the goal is not to make fun of these people, businesses or brands, but to raise awareness that it’s time for an update.

    I know, I know– total first world problem, right? Well, honestly, some of these businesses or brands simply don’t know that the icons are outdated. What’s worse is that they don’t realize that most Twitter users don’t even know what that old lower-case “t” icon is.

    Most often, it’s the Twitter, Facebook, or Instagram icons that are messing everything up. So be on the lookout for those usual suspects. I go more in-depth on the most commonly misused social media logos in another article. I won’t bore you with it again here.

    Updated Social Media Icons FTW!

    Whether it’s a blog, business site, or just a cool infographic, one outdated social icon can totally ruin it.

    I can understand though that it’s not easy to stay on top with how often some of these sites change their icons. So I’ve made it my goal to not only keep myself updated but to help keep you updated as well.

    For me, this is one of those small details that can communicate volumes about your digital presence. Staying on the cutting edge keeps you relevant, reinforces trust, and helps you achieve social media rockstar status.

    If you’re going to build and design a blog worth following it is essential that your social media links are both visible and current. That’s why I created this free icon set for you to download and use at your leisure.

    What is in the set?

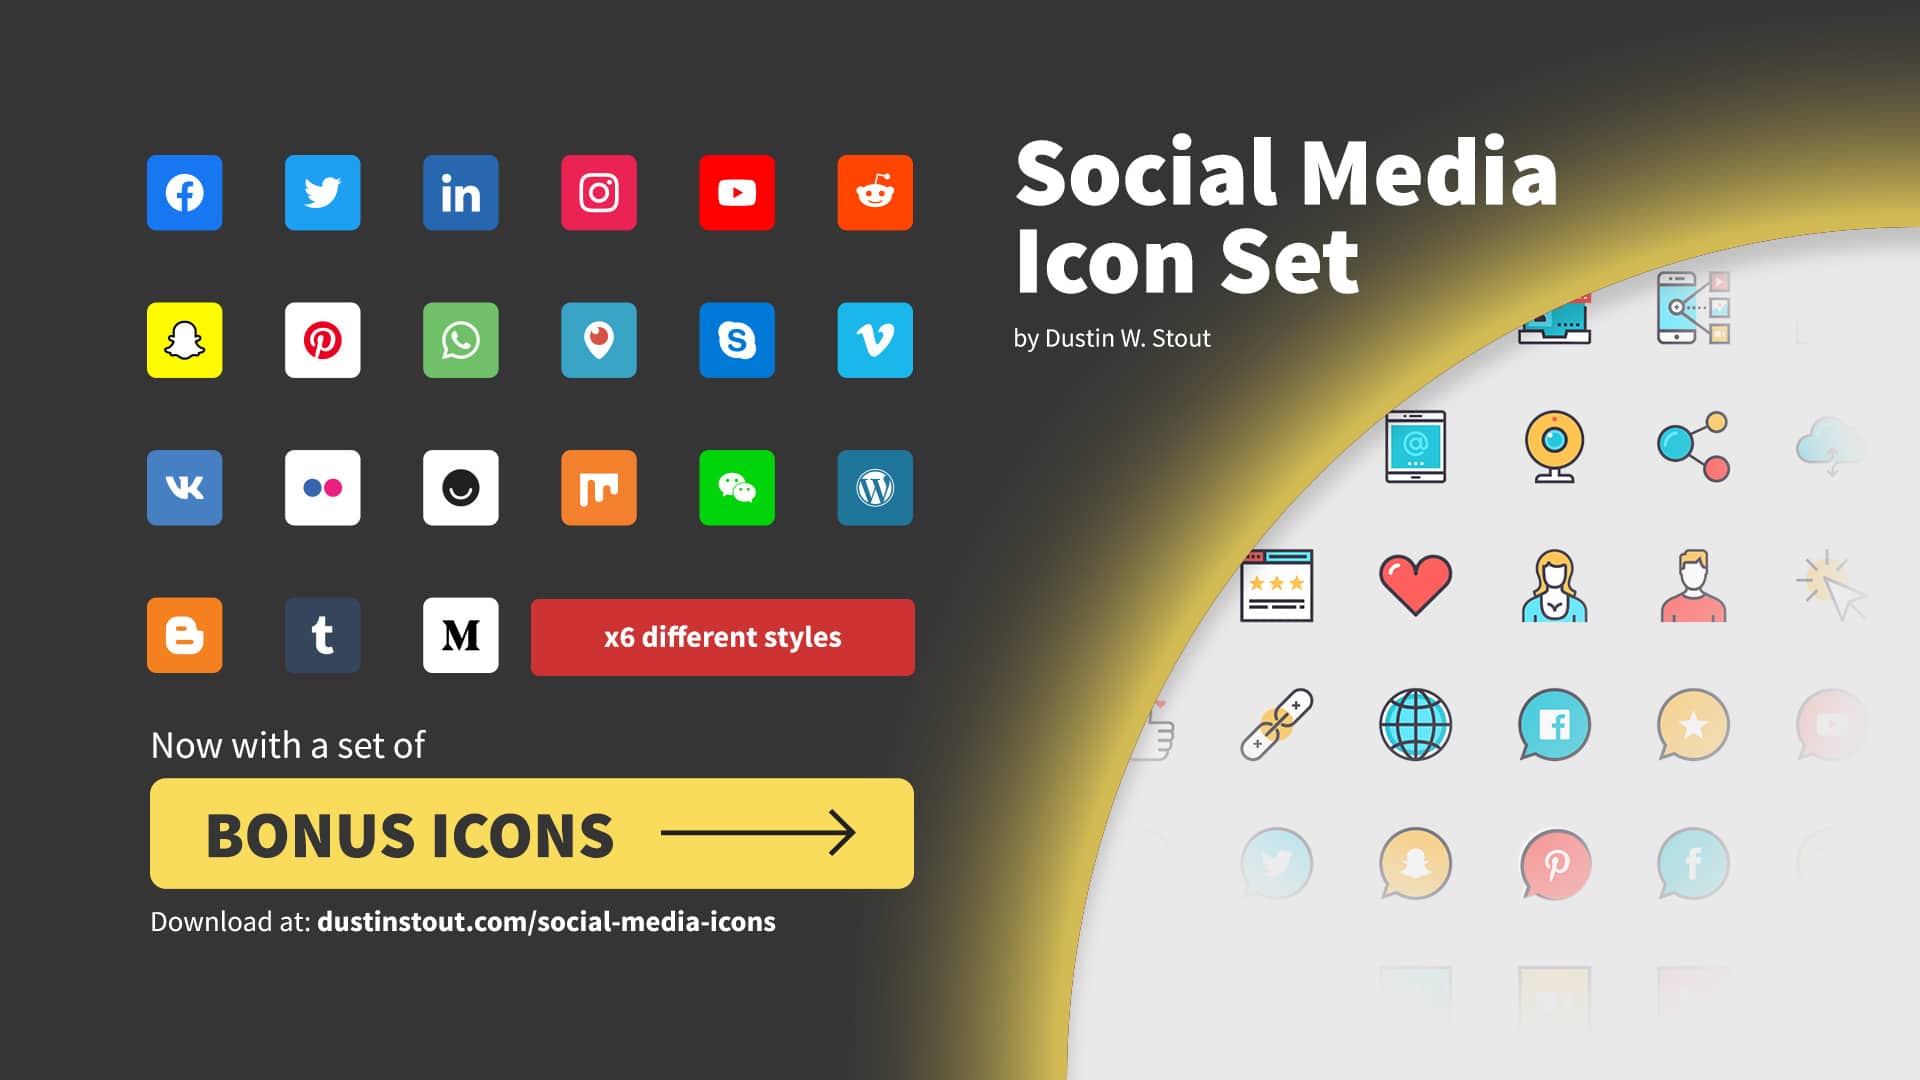
    I’ve hand-picked the most popular social media networks and apps and created six different styles.

    This icon set contains a square icon version and a minimalistic (isolated) version (without the square). Both versions come with 3 different color schemes (color, black, and white).

    Additionally, they are in .png format at 32×32 pixels so they are easy to drop into your websites as social media links.

    The social networks included are:

    • Facebook (updated)
    • Twitter (updated)
    • LinkedIn (updated)
    • Instagram
    • YouTube (updated)
    • Reddit (updated)
    • Snapchat
    • Pinterest (updated)
    • WhatsApp
    • Periscope
    • Skype (new)
    • Vimeo
    • Vk (new)
    • Flickr
    • Ello
    • Mix (new)
    • WeChat (new)
    • WordPress
    • Blogger
    • Tumblr
    • Medium

    Six sets of twenty-one icons, that’s a total of 126 free social media icons that I’ve created for you!

    Want the vector versions of these icons (.psd and .ai files)? Skip ahead.

    Needless to say, it took some time to craft all of these. Being a full-time husband and daddy, I just can’t maintain icons for every single site out there. However, I am open to requests if you have any specific icons you’d like for your set– just leave them in the comments below.

    The goal is to stay as current and accurate to each social network as possible to ensure brand consistency but also have a uniform look and feel.

    I will be keeping these social icons as current as possible. Every time one of these social networks changes its icon– you can bet I’ll be updating these sets as soon as possible.

    Bonus Icons for Your Graphics Needs!

    As I said previously, the good folks over at Vecteezy have agreed to create a special set of social media related icons for my audience! These are exclusive Dustn.tv graphics that you are free to use on any and all of your projects!

    Here’s a preview of what’s in the bonus set:

    There are 35 icons in total, and they come in .ai and .png formats. Wah-hoo!

    Download Vector Social Media Icons

    Just add your email below, and you can download the vector (.psd and .ai files) of my free social icon set instantly!

    Download Vector Social Media Icons (.png, .psd, and .ai)

    Add your email below and we’ll email you the download link. We will also notify you of any updates to this resource as well as new resources we create.

    By adding your email, you also get access to my growing library of downloadable resources for all your social media and online marketing needs.

    You may also be interested in downloading my free official social media logos for larger scale use. That resource includes high-resolution versions of official social network logos for when a 32x32px icon isn’t enough.

    Latest Updates to Social Media Icons

    Included in this most current set were some updates, new additions, and several removals of social networks that are no longer with us. The updates I make to this set are always to keep the most accurate representation according to each brands guidelines.

    See if you notice a pattern in some of these updates.

    Facebook has recently started updating all it’s logos for a more unified brand across apps. The icon now matches the most current version of the Facebook icon found on it’s brand website. The primary blue color also got a brighter shade–my guess is to give it a younger appeal.

    Twitter, in the past year, changed it’s primary blue color also. Just as Facebook, the blue is brighter, giving it a greater appeal to younger audiences.

    LinkedIn hasn’t made any changes to it’s primary icon, however–surprise surprise–they’ve made their blue an ever-so-slightly brighter shade.

    YouTube has begun showing its logo in a brighter shade of red, and therefore I’ve updated the set to match. Are you sensing a trend here among social media logos?

    Pinterest’s shade of red has become–wait for it–a tad bit brighter.

    Skype is a brand new addition to the set. While not seemingly a “social network” in the popular understanding of the term, it can actually be categorized as such. With the wide amount of usage, I felt is was a worthwhile addition to the set.

    VK, the popular Russian social network has been added to the list by popular demand. With nearly 100M users worldwide, it was definitely time to add it to my free icon set.

    Mix has been added to the mix–see what I did there. StumbleUpon, its predecessor, was shut down and absorbed into Mix back in 2018. It has yet to acquire mainstream adoption, but I believe it is one to watch.

    WeChat is a messaging app very similar to WhatsApp, but was created by Chinese company Tencent. It has over 1 billion monthly active users and is mostly popular in China.

    And last, but certainly not least, there have been a few social networks since the last update that have either gone the way of the dodo, or they’re slowly being shut down. The following social network icons have been removed from the set:

    • Blab
    • StumbleUpon
    • Vine
    • Meerkat
    • Google+

    As always, I’ll be sure to keep an eye out for any network updates, changes, or shutdowns. As long as you stay subscribed to the email list, you will always be in the know!

    Sponsored: If you’re looking for more icons, my friends over at Iconscout have over 3 million high quality design assets to choose from.

    Are there any sites that you think I should have included in the set? You can leave a comment by clicking here.

  • 2024 Social Media Logos: 21 Most Popular Social Networks [Free Download]

    An always-updated, one-stop free resource for the most current social media logos of the most popular social networks. And the best part is these minimalistic social icons are all free.

    As social networks grow from bootstrapped tech start-ups to a thriving social platform, they’re bound to undergo some logo changes. I have a particular sensitivity to when these social media logos change because branding is one of the things I do for a living.

    When I see someone use a social media logo that is out-dated, or worse— a cheap knock-off of an official logo, it bothers me. It not only hurts my eyes, but it also gives the impression that the individual using it either doesn’t know better (they’re not paying attention to what they’re talking about) or they don’t know the importance of using credible visuals.

    For the average person, keeping up with these social media platforms’ changes can be impossible.

    So as a public service, I’ve decided to keep an updated list of the top social networks logos along with some visual assets that you can freely use to your heart’s content with no restrictions for personal or commercial use.

    Just here for the free downloadable goods? Skip to the download

    Why Care About Accurate Social Media Logos?

    You may have seen my free Social Media Icons set that was created for a similar purpose. It’s a hand-crafted set of flat design JPG and PNG icons with solid and transparent background. That set is actually the basis for my social share icons.

    But really it’s more than just an obsessive personal preference.

    First, let’s talk about why it most benefits you to use the most up-to-date versions of social media logos.

    Accuracy = Credibility

    When people visit your website, they’re visually analyzing their experience whether they realize it or not. They’re looking for visual queues to tell them whether or not you’re trustworthy enough for them to stick around.

    Having out-dated graphics can communicate that:

    • You are out of touch with or not savvy enough to know what is current
    • You don’t know what you’re talking about

    These have negative effects on your credibility and act as a psychological repellant to your visitors. It might be an unconscious response as the viewer to not even realize why he/she thinks your site or whatever they see pertaining to you is not credible.

    We tend to make millisecond responses to things without even realizing why we don’t like something. Digging in deeper helps us to realize that these little things play a HUGE role in viewer response toward credibility.

    I have spoken at SMX East and West about this very topic of Visual Trust Indicators. And while this is but a small part of communicating trustworthiness, it’s also a very easy thing to fix.

    Because… Branding

    These companies spend hundreds of thousands of dollars on branding. They pay a graphic designer (or team of designers) like myself to craft their visual identity so that it will be consistent and recognizable.

    Believe it or not, icon design is an artform in and of itself.

    Also, each social media network creates guidelines which dictate what is allowed and what is not allowed in regards to their brand icons. It’s a lot of work building a brand identity. So out of respect (and legal compliance) for the brands themselves, I have resolved to represent the respective companies as they so desire.

    This makes sure that I’m both in compliance with them (just in case they see what I do with their brand) and also gives the graphics that I create and share the look of authority and “know how” that has gotten me very far.

    Most Popular Social Media Logos

    Over the years, social networks have undergone a lot of changes–especially in the branding department.

    The following are social sites are the most popular, and therefore the most susceptible to misrepresentation. To save you from getting caught with an outdated or completely wrong logo, here are the official logos of the most popular social platforms.

    Official Facebook Logo

    The newest Facebook logo (which is being slowly rolled out) is simply the trademark ‘f’ centered inside a circle. There’s no more square, no more offset for the ‘f’, and the new blue color is brighter.

    This new Facebook icon hasn’t gathered much attention as of the time of this post, but as they begin to roll it out in places other than their brand guide, I’m sure it will gain some mainstream attention.

    For now, consider yourself one of the first people to know about it!

    Facebook has stayed pretty consistent with their logo over the years, and all changes have been subtle enough as to not draw much attention.

    However, over the past year, there have been more dramatic changes, especially to it’s wordmark. The change sparked a lot of debate in the design and branding community, but most average users didn’t even notice.

    See if you can spot the difference:

    The changes are subtle, but I think I understand why the choices were made. For one, the new word mark is softer, less “techy” looking with rounder curves. It’s a bit lighter in its weight, and feels more friendly than the previous wordmark.

    Official Instagram Logo

    Over the years the Instagram logo has continued to get simpler. It started as an iOS-only app and the icon was meant to match Apples then skeuomorphic design. When apple switched to the flat design trend, Instagram soon followed suit.

    With the continued design trend of simple, minimalistic icons, Instagram again changed their logo to what we see it as today.

    While the Instagram word mark has remained pretty much identical–apart from color–the icon’s current iteration is about as simple as you could possibly get.

    Official Twitter Logo

    The most frequent victim of visual confusion is the Twitter logo. Whether it’s a TV show advertising its social profiles, or a business asking people to follow them online, Twitter icons seem to be all over the place as far as accuracy.

    It’s partially Twitter’s fault since they’ve undergone so many icon changes over the years and people just can’t seem to keep up.

    Their current official logo is the bird with its head angled up. It’s a brilliantly crafted icon and deserves to be represented properly. So for the love of all things holy, stop using that ridiculous lower-case ‘t’ icon.

    Official YouTube Logo

    How many people can remember when YouTube first started? The internet was a completely different place, wasn’t it?

    Since its inception, YouTube’s logo has undergone only a handful of changes, and mostly very subtle. It wasn’t until recently that a major rebranding happened, giving the video-centric platform a very modern logo.

    Both the full version and its icon are used throughout its various apps and properties, unlike Twitter, Instagram, and Pinterest who primarily focus on their icon.

    What I really love about the YouTube icon is how utilitarian it is–it’s the play button that appears on every video you watch. Brilliant use of repetition so that brand recognition is easy.

    Official Pinterest Logo

    Oh, Pinterest, how I love thee.

    The Pinterest icon has remained the same since its inception over 12 years ago. And what a delight that is for many a designer.

    Now, to the eagle-eyed onlooker, you may have noticed that the color of red has changed slightly over the years. The most current red in their branding is as bright as it’s ever been, following the same bright color trend that other networks such as Facebook, Instagram, LinkedIn, and YouTube have employed.

    Other than that, though, the Pinterest icon remains completely unchanged. And that makes my job so much easier.

    Official LinkedIn Logo

    Much like Pinterest, LinkedIn has stayed pretty close to its brand roots with it’s primary logo. The only thing that has changed is the primary blue.

    Much like the other networks, my guess is that brighter colors are aimed at targeting younger audiences, and giving the brand a more fresh or exciting feel. Younger people tend to be attracted to brighter colors, so this seems a smart move for all social media platforms.

    LinkedIn also makes good use of it’s solitary icon logo when minimal space is available.

    All Social Networks

    For the sake of time (and energy) I’m not going to give a synopsis of every social media network’s brand logo history. So instead of droning on and on through all 21 networks, I’ve instead decided to just package up all the logos into one downloadable set.

    Download All the Official Logos

    Simply click the download button below to download all the high-resolution official logos for the following social networks:

    • Facebook
    • Twitter
    • Instagram
    • LinkedIn
    • Pinterest
    • Snapchat
    • Reddit
    • YouTube
    • WhatsApp
    • Periscope
    • Vk
    • Skype
    • Vimeo
    • Flickr
    • Ello
    • Mix
    • WeChat
    • WordPress
    • Blogger
    • Tumblr
    • Medium

    The package includes four styles of each social media network logo in high resolution JPG and PNG format. Styles includes:

    • Full color logo in JPG file format
    • Full color icon in transparent PNG file format
    • White icon in transparent PNG file format
    • Black icon in transparent PNG file format

    If you’re a designer or work with professional grade design tools and want the vector versions of all the logos, I’ve got that for you as well.

    Download the Vector Logos

    Simply add your email below and click Download! You will get a confirmation email with all the vector icons in both PSD and AI format. That package also contains all JPEG and PNG files to save you the time of having to download both sets.

    Download All Social Media Logo Assets (JPG, PNG, PSD, & AI)

    Just enter your email and the download link will be sent straight to your inbox! You’ll also be added to our email list and be the first to hear when new assets are available.

    The PSD files contain smart objects for scalability (if you don’t want to open Illustrator). If you are an Adobe Illustrator user, the AI file contains all icon sets, sized at 32px if you want to use them to create your own cool icons.

    Save them, add them to your social media icon collection, insert them into a great visual you’re creating for your next blog post, and share freely knowing you have the most official version of the brand logo represented.

    Hope You Enjoy

    I’ve done the hard work in rooting through the brand guidelines of each network to make sure all these logos included above are accurate and up to date. If you’d like to double-check for yourself (which I highly encourage you to do) here are the links to each network’s publicly visible guidelines:

    Oh, and lastly–if you missed my reference above, I do have a free icon set made from these icons that are already pre-formatted at 32px. This makes it easy for you to use them in your blog or website as links to your social media profiles. Be sure to download those as well!

    Are there any social networks that you’d like me to add to this list? You can leave a comment by clicking here.

  • Facebook Image Sizes 2024: Everything You Need to Know

    What are all the Facebook image sizes you need to know in 2024? Well, consider this your one-stop guide to everything from Facebook cover photo size to profile picture size, ad sizes, and more.

    In the beginning, Facebook was mostly text and links with the occasional baby photo flying through your stream. However, with the changing trends in social media, visual content has become a dominant force and the world’s largest social network has evolved with the trends.

    Photos. Videos. Animated GIFS (soft g on that pronunciation). They’re all the rage.

    Truly, a picture is worth more than a thousand words, and Facebook has ensured that you can effectively communicate your thoughts and experiences with the use of high-quality images.

    And those making great use of Facebook’s visual nature are getting the best results with their social media marketing.

    Facebook is the leading social media platform, after all, so it’s important that you approach it armed with all the information you need.

    Keeping up with the ever-changing image sizes and formats on Facebook is a dizzying, and exhausting task.

    But I’ve got you covered.

    In this post, I’m going give you the most accurate and up-to-date references to the ideal Facebook image sizes and dimensions. This post includes:

    • Facebook Profile Photo Size
    • Facebook Cover Photo Size
    • Facebook Page Cover Photo Size
    • Facebook Event cover photo size
    • Facebook Group cover photo size
    • Uploaded Image Sizes
    • Link Post Image Size

    Now, this information will be extremely helpful to the many of us who are plagued with perfectionism and want to make sure every image is the right size. But if you’re just looking for some quick and dirty “get-r-done” templates, you’ll want to download my Social Media Image Templates.

    With that said, let’s dive in!

    Want to skip strait to the free, downloadable templates?

    Facebook Profile Picture Size (Profiles & Pages)

    Unlike cover photos, profile pictures will not only appear on your Facebook timeline (a.k.a. profile page) but will also appear on each post that you share, every comment you leave, in Facebook search results, and on people’s timeline where you post messages. In most cases it will be a small thumbnail, so you want to crop it right.

    Needless to say, this is probably the most important visual representation of you on Facebook, so you’ll want to get this one right.

    A profile picture is a square image that measures 168px by 168px on desktop. However, be aware that even though you’ll be uploading a square photo, it will be cropped into a circle.

    So make sure your picture accounts for those corners being rounded off. You don’t want any logos or focal points to be cut off.

    Facebook also stores a higher resolution version at 320px by 320px.

    The size of the profile picture that is seen in the comments you make, however, is scaled down and resized to a square image of 40px by 40px.

    Lastly, if someone clicks on your profile photo, it can be displayed as large as 850px by 850px. The highest resolution Facebook will store is 2048px by 2048px.

    Holy heck, Dustin, that’s a lot of sizes to remember—my head is dizzy trying to follow all that.

    Have no fear, friend; I’m going to make it really easy for you.

    When creating your profile picture, I recommend creating them at the highest resolution, 2048px by 2048px.

    That will ensure that you are presenting the highest quality image for your most important Facebook asset—your profile picture. It’s how people will come to know you, so you want it to be good.

    Down and dirty dimensions:

    • Max size: 2048px by 2048px
    • Minimum size: 168px by 168px
    • Minimum recommended size: 761px by 761px
    • Aspect ratio: 1:1

    Pro-tip: People like to connect with your eyes, so make sure your eyes (and mouth, preferably a smile) are visible in the smallest size of your Facebook profile picture.

    You can right-click the image to “Save as” or you can just download the entire set of templates from this article at the end of this post.

    Facebook Cover Photo Size (Profile)

    Located at the top of your personal Facebook timeline, your cover photo is the perfect place to showcase your personality.

    A Timeline cover photo measures 851px by 315px. This is the minimum size that Facebook will display the photo at.

    For those of you who like aspect ratios, the cover photo comes in at 2.7:1.

    However, just like Instagram’s image sizes, the display size isn’t the only size you should know.

    Bonus Reading: If you’re looking to create a great Twitter Profile Header image, YouTube Channel art, LinkedIn header too, I have a post all about Social Media Cover Photos.

    If you peek behind the source code, you find that Facebook is storing a higher resolution version, and the upper limit seems to be 2037px by 754px. So, if you want the highest resolution image use those dimensions.

    However, if you’re viewing it on a mobile device with Retina Display or other high resolution displays (which most smartphones have nowadays) the actual display size is 1125px by 633px.

    Down and dirty dimensions:

    • Maximum size: 2037px by 754px
    • Minimum size: 851px by 315px
    • Aspect ratio: 2.7:1

    Pro tip: Make your profile cover something personal that makes you look like a real human being.

    Don’t think of it as a banner ad, think of it as an extension of your profile picture. Avoid text and calls-to-action at all costs.

    Also, be aware that because of certain user interface elements, parts of your profile cover will be covered up.

    If you like, I’ve gone ahead and mapped out a template for you below.

    You can right-click the image to “Save as” or you can just download the entire set of templates from this article at the end of this post.

    I’ve also created free social media cover photos templates for all the most popular networks if you want to give them a look.

    Facebook Page Cover Photo Size

    If you’re using Facebook business to grow your brand, you’ll want to make sure your cover photo is the crown jewel of your business page.

    For Business Pages, Facebook cover photos are an incredible way to display what your brand is about, and visually connect with your target audience. However, the cover photo dimensions are slightly different from that of personal profiles. They display at a size of 820px by 312px.

    As with everything else, Facebook will store a higher resolution version if you upload it. The maximum resolution you can upload is 1958px by 745px.

    Facebook will automatically resize it as needed for various screen resolutions.

    The great thing about these new Facebook Page Cover Photos is that they no longer have any obstructed area on them. There are no interface items over the cover photo, nor is your profile photo partially blocking it.

    You get to utilize 100% of the space to maximize your cover photo.

    As with my previous recommendation, however, I would not use this space as just another banner advertisement.

    Use it to give personality to your page—a branding opportunity rather than a marketing opportunity.

    Bonus Tip: If you want to design your Facebook cover photos with ease, there are two tools I recommend: Canva, and Picmonkey. Both are free to use and have pre-built Facebook cover photo templates. For more recommendations read The Best Tools for Creating Visual Content.

    Down and dirty dimensions:

    • Maximum size: 1958px by 745px
    • Minimum size: 820px by 312px
    • Aspect ratio: 2.63:1

    And here’s a simple template to give you a starting point.

    You can right-click the image to “Save as” or you can just download the entire set of templates from this article at the end of this post.

    Facebook Group Cover Photo Size

    Now, this one is tricky because Facebook decided to make it complicated.

    You see, it’s not as simple as just uploading an image in the exact display dimensions. The group cover photo requires you to have a cropped area and adjust the image vertically in the viewable zone.

    Why? Nobody knows.

    But here’s the details you need to know.

    The minimum viewing area is 820px by 332px. But if you upload an image that size (or equivalent ratio) you will need to adjust it horizontally. It’s a nightmare.

    So, instead, what looks to be the optimal size to upload is an image that is 820px by 461px. This will allow you to reposition the image vertically within the viewable area.

    For the highest resolution, I recommend going with double those dimensions (to accommodate retina displays) and use the dimensions of 1640px by 922px.

    There are other templates and tutorials out there recommending to do 1640×921, but I like clean numbers. Especially knowing that Facebook will resize the image to only be 820px wide on standard displays, I don’t want them sizing down to a half-pixel size.

    Down and dirty dimensions:

    • Maximum: 1640px by 922px
    • Minimum: 820px by 461px
    • Aspect ratio: 1.78:1

    Feel free to use the following as a template to make sure you’re getting all of your important elements in the viewable area.

    You can right-click the image to “Save as” or you can just download the entire set of templates from this article at the end of this post.

    I’ve created it so that the bigger gap is on the top, so when you upload the final image to your Facebook Group, all you need to do is drag the photo up as high as it will go.

    Facebook Event Cover Photo and Video Size

    If you’re hosting an event on Facebook, you’ll want to utilize their cover photo as well.

    An event cover photo displays at 500px by 262px on standard displays.

    For the best result, however, you can double those dimensions to be 1000px by 524px to ensure that the photo looks great on all screen resolutions.

    Down and dirty dimensions:

    • Maximum: 1000px by 524px
    • Minimum: 500px by 262px
    • Aspect ratio: 1.91:1

    And if you’re looking for a handy template to get started with, here you go.

    You can right-click the image to “Save as” or you can just download the entire set of templates from this article at the end of this post.

    You can also upload video to your Event Headers, and it will be displayed at the same size as an image header.

    The resolution of your video can be standard HD, but just be aware it’s going to get resized and cropped to the dimensions mentioned above. Users can view at full screen, however, and it will not be cropped there.

    Sponsored: If you don’t want to mess around trying to figure out the proper sizing, Snappa’s easy-to-use graphic design tool has amazing Facebook templates with the dimensions built right in. You can try it for free here.

    Facebook Image Upload Sizes

    Over the years, Facebook has gotten much better at maintaining image quality when uploading photos. It used to be absolutely horrific.

    (Of course, I’m slightly exaggerating. But only slightly.)

    These days, when you upload a photo, the quality loss is very little. I’m very glad they’ve now made image quality a priority when resizing and optimizing photos on their platform.

    When you upload a single image to a Facebook post, the maximum width it will display in-stream is 492px.

    The height will depend on the orientation or aspect ratio of the image you’re uploading:

    • Square: in-stream display will be a maximum of 492px by 492px
    • Portrait: in-stream display will be a maximum of 492×738
    • Landscape: in-stream display will be a maximum of 492×276

    Expanding Images in Theater View

    When you click on the image to expand it in “theatre” (a.k.a. Lightbox) view, it will scale up to fit whatever screen size it’s being shown on.

    There is no way to account for every possible screen size in the world, so the following are basic guidelines.

    Facebook seems to have an upper limit of 2048px for height or width.

    So regardless of your image orientation, if one of its measurements is higher than 2048px, then Facebook will resize the image to get that value as close to the 2048px as possible while maintaining the same aspect ratio for the image.

    Make sense? Of course it does—you’re very smart. I like you.

    Now, the following sections are for the super-obsessive types that want to know the exact pixel sizes of everything.

    If you’re one of those people, good for you. And here you go!

    Multiple Square Oriented Photos

    For uploading square images, here are the various sizes based on how many photos are uploaded:

    • One square: 492px by 492px
    • Two squares: 245px by 246px (both)
    • Three squares: 492px by 245px (top), 245px by 245px (bottom two)
    • Four squares: 245px by 245px (all)
    • Five squares: 245px by 245px (top two), 163px by 163px (bottom left, bottom right), 162px by 163px (bottom middle)
    • Six squares: Same as 5 but bottom right photo has an overlay displaying the number of photos not shown.

    For everything over six images, the layout will be exactly the same.

    Multiple Portrait Oriented Photos

    If you’re uploading multiple portrait oriented photos, here are the various sizes according to how many are uploaded:

    • One portrait: 492px by 738px
    • Two portrait: 245px by 492px
    • Three portrait: 327px by 492px (left), 163px by 245px (right top and bottom)
    • Four portrait: 327px by 492px (left), 163px by 163px (right top and bottom), 163px by 162px (right middle)
    • Five portrait: 245px by 245px (top two), 163px by 163px (bottom left, bottom right), 162px by 163px (bottom middle)
    • Six portrait: Same as 5 but bottom right photo has an overlay displaying the number of photos not shown.

    Again, for everything over six images, the layout will be exactly the same.

    Multiple Landscape Oriented Photos

    Hopefully, now, you see a pattern. Here are the layouts for uploading multiple landscape photos.

    • One landscape: 492px by 276px
    • Two landscape: 492px by 245px
    • Three landscape: 492px by 327px (top), 245px by 163px (bottom left and right)
    • Four landscape: 492px by 327px (top), 163px by 163px (bottom left, bottom right), 162px by 163px (bottom middle)
    • Five landscape: 245px by 245px (top left and bottom left), 245px by 163px (top right and bottom right), 145px by 162px (middle right)
    • Six landscape: Same as 5 but bottom right photo has an overlay displaying the number of photos not shown.

    And if you guessed that for everything over six images, the layout would be exactly the same, you’d be 100% right!

    Uploading Photos with Multiple Orientations

    If you’re uploading multiple images, all with different sizes and orientations, Facebook is going base the layout on the first photo.

    So if your first photo is a Portrait, you can expect to see the Portrait layouts applied based on how many photos are being uploaded.

    Make sense? Great, now let’s move on.

    Facebook Ads Images

    In case you didn’t know, there are various ways in which you can use images in Facebook Ads. And the image specs vary based on where you want your ads to be viewed.

    Current Facebook Ad image placements include:

    • Facebook Feed: Displayed inline as a standard Facebook post
    • Facebook Right Column: The small spot at the bottom of the right sidebar in Facebook on Desktop only
    • Facebook Instant Articles: This is a specialized article format for delivering fast-loading articles on mobile
    • Facebook Marketplace: This similar to the Facebook Feed type, and is only displayed in the Marketplace (mobile only)
    • Sponsored Message: These ads show up just like any Facebook message from a friend
    • Messenger Home: These will be seen on the main “Home” page of the Facebook Messenger app

    The recommended image size for an advertisement image is 1200px by 628px which works out to an image ratio of 1.91:1.

    However, since you can advertise on Facebook by promoting your page’s posts, all of the previous image sizes, dimensions, and layouts can apply.

    The only instances where the 1200px by 628px image rule applies is on Link Posts, which are the next thing we’re going to talk about.

    Link Post Images

    Shared link images that appear on personal timelines or when they appear on the news feeds measure 476px by 249px. To ensure a high resolution image, the recommended image size is 1200px by 628px.

    Now, the problem here is that if you’re sharing a link to a website, Facebook no longer gives you the ability to customize that image that shows up. The image has to be automatically pulled from the destination web page.

    So that means if you’re sharing your own website pages, you’ll need to make sure you have the proper HTML markup–known as Open Graph– on those pages that will identify the image that Facebook should use.

    It just so happens that one of the products I co-created, Social Warfare, will allow you to do this easily if you’re using WordPress.

    And, of course, I’ve got a template for that as well.

    You can right-click the image to “Save as” or you can just download the entire set of templates from this article at the end of this post.

    Bonus Resource: If you’re like me and would rather just have a “minimum viable product” image template, then you’ll want to grab my Social Media Images templates. Only 4 sizes you need, and I’ve templated them for you.

    Facebook Image Sizes Infographic

    It wouldn’t be right for me to have all these beautiful image size graphics and not put it into one, beautiful infographic for you.

    So here you go, your Facebook Image Sizes cheat sheet:

    And if you would like to share this on your website, just copy and paste the code below:

    <a href="https://dustinstout.com/facebook-image-sizes/" target="_blank"><img src="https://dustinstout.com/free-resources/facebook-image-sizes-infographic.jpg" alt="Facebook Image Sizes Infographic by Dustin Stout" /></a><br /><em>Image courtesy of <a href="https://dustinstout.com" target="_blank">Dustin W. Stout</a></em>.

    All Facebook Image Templates

    If you want the quick and dirty templates I’ve created for all the vital Facebook image things, just enter your email below and I’ll email you the download link.

    Download All Facebook Templates

    Add your email below and I’ll send you the download link for all these templates so you’ll never have to try and remember them.

    Of course, it should go without saying that I will never share your information with any third parties.

    By entering your email you are only being subscribed to my newsletter which grants you access to all the free things I create as well as the occasional update from me (typically no more than once per week).

    Anyone Else Ready for a Nap?

    It was exhausting finding all these photo sizes.

    But I hope it saved you from scouring the internet for hours on end looking for all the proper image sizes and dimensions you need. Your Facebook account will never have looked better after putting these into practice.

    If you feel I’ve missed anything, or just want to say, “thanks for this amazing Facebook image size guide”, please let me know in the comments below.

  • The Ultimate Social Media Image Sizes + Templates

    Looking for all the “right” social media image sizes? Don’t fret, I’ve got you covered.

    What size do my images need to be for Facebook? Twitter? Instagram?

    There are countless blog posts and infographics telling you the social media image sizes you need to know. You know the biggest problem with all of them? They’re too stinking complicated!

    It’s impossible to memorize every single image dimension for every single network, especially when they’re changing so often.

    So I’ve come up with my own solution. A solution that has served me well, creating thousands of social media images for myself and clients alike. This solution works so well, I even use it for my fitness social media graphics business.

    And it’s simple.

    There are only four dimensions you need to know. That’s it. And I’m not only going to tell you what they are, I’m going to give you free templates to start with every time you create a new social media image or graphic.

    Bonus: Don’t leave without downloading my free social media image templates at the end of this post!

    Consider these your minimum viable blueprints— for those who want to stop wasting time and get things done.

    Too Many Social Media Image Sizes

    You don’t need to know what size something is when it’s viewed on every possible screen. You don’t need to know what size the thumbnail preview is. You don’t need to know the exact dimensions of a Facebook profile photo when it’s being seen on a desktop or smartphone.

    You just need to get it done.

    All you need to know is what sizes work best and what networks they work best on. So here is your dead-simple guide to social media image sizes.

    And P.S. if you’re looking for social media cover photo dimensions, you’ll want to view the post I have dedicated to that specifically. It’s even got its own downloadable templates!

    Social Media Image Sizes

    Landscape, portrait, and square. These are the only three sizes that you need to know. I have added one bonus size though, specifically for Facebook link snippets, but more on that in a minute.

    Here a quick reference cheat sheet for visual image sizing:

    If you would like to embed this graphic on your own site, just copy/paste the code below and it will always stay updated:

    <p><a href="https://dustinstout.com/social-images/" target="_blank"><img src="https://dustinstout.com/free-resources/social-media-image-sizes-infographic.jpg" /></a></p><p>Image courtesy of <a href="https://dustinstout.com" target="_blank">Dustin W. Stout</a>.</p>

    Just for good measure, here are the four social media image dimensions I use for each one of my templates:

    • 1920×1080 (Landscape)
    • 735×1080 (Portrait)
    • 1080×1080 (Square)
    • 1200×628 (Facebook specific)

    To make it even easier for you, I’ve created the following downloadable blueprints for you to use as starting points for your images.

    Social Media Image Templates

    Simply add your email below and click the Download button. Your download link will be emailed to you immediately!

    Once you download them, you’ll notice that each template has social icons on it. I’ve done this so that you can instantly know which social networks these dimensions look best on.

    Bonus reading: If you’re looking specifically for Facebook image templates, you’ll want to reach my Facebook Image Sizes: Everything You Need to Know article.

    My Reasoning

    After going through each social network and testing out which image size looks the best, I came to a few conclusions about each.

    Landscape

    The landscape orientation (1920×1080) is a perfect HD quality 16:9 aspect ratio. This size works great on Google+, Twitter, Facebook and LinkedIn for image uploads

    This is the first and most important social media image size.

    Why? Because it covers all the biggest social networks in one swoop. If you have limited time and want to be super efficient with your image creation just create this version of your image.

    On Google+ if your image is high quality and landscape ratio it looks the best when expanded into the lightbox interface. If you follow my Anatomy of A Perfect Google+ Post, you’ll definitely maximize both your reach and your engagement on the platform using this image dimension.

    On Facebook the landscape orientation appears in the full width of the post area covering as much horizontal space as possible.

    Now, you’ll notice I’ve included a fourth template that is 1200×628. This is because Facebook has a very specific image size ratio that populates for link previews.

    In order to keep from getting your images cropped in an undesirable way, and minimize the degradation of the image quality (because Facebook sucks at resizing images and maintaining quality) you’ll want to use the 1200×628 for all images destined for Facebook link snippets.

    On Twitter image previews are shown in landscape with the top and bottom cropped out, so using a landscape image just makes sense.

    On LinkedIn images only cover the full horizontal area when they are landscape. Otherwise, you get a big gap of space to the right of the image, making it look less significant.

    Bonus tip: If you keep all your points of focus (text or primary image subject) in the square area of the template you can easily use it on Instagram as well, killing two birds with one stone. There will be some minor cropping, but if all your vital components are in the square in the center, you’re golden.

    Portrait

    Power users have known for quite some time that tall images work best on Pinterest. You get more real estate in the Pinterest stream, making it more visible to those scrolling through.

    But why 735×1080? Good question.

    Basically, Pinterest recommends images be approximately 735×1102. The 735px is the maximum width that Pinterest will ever display images at in its current user interface. The 1102px height keeps it tall enough to cover most people’s browser windows without having to scroll.

    When I started creating tall images specifically for Pinterest, my Pinterest traffic went through the roof! It really works!

    So why did I cut my template’s height by 22px? Another good question. You’re just full of them aren’t you?

    In order to keep my workflow as streamlined as possible, I wanted to keep a base height of 1080px for all my templates. This makes it easy to copy/paste elements from one to the others with minimal resizing.

    This style also seems to do relatively well on Google+. From my personal experience, this style doesn’t yield as many views or engagements on Google+ but can be a nice variant from time to time.

    Square

    Thanks primarily to Instagram’s size limitations the square image has become increasingly popular on social networks.

    Why 1080? Since Instagram is the primary network in which square images are being used, I went by their maximum dimensions which are 1080×1080. Although they may only display a smaller, 600×600 image, their servers will keep a maximum of 1080×1080 (which you can see if you dig into their source code).

    You can use square images on Google+ or Facebook as well and see decent engagement and reach. On Facebook, it doesn’t seem to matter quite as much, but I still recommend the landscape over the square due to the standard lightbox interface when you click on an image to view the larger version.

    I also recommend using this size for creating profile pictures (or avatars) for your social networks as most of them use squares. While most networks don’t recommend an image this large, the higher the image quality/resolution the better I always say.

    Now go create!

    So take these templates and use them in your favorite image editing software as a starting point for your next set of sharable social images.

    Oh, what’s that you say? You would like a recommendation of the best free image creation software available? Well, that’s awfully convenient, because I’ve covered all you could possibly need in the following:

    If you have any questions about using these social media image templates, let me know in the comments below!

  • How to Create Optimized Social Media Images Like A Boss

    Everyone is doing visual content these days. Follow these image creation tips and leave them in the dust.

    Smart bloggers, social media stars and marketers alike have caught on to the visual content trend. Have you?

    It’s clear that visual content allows you to grab more eyeballs, yields more engagement and performs better long-term for your digital marketing efforts. But the longer this trend is around, the harder it will become to stand out.

    And for most bloggers and social media pros, creating images or social media graphics is time consuming and tedious work.

    With this post, I hope to help you create a workflow and give you some tips to help you create and optimize your social media images.

    You can almost call this a minimum viable workflow for social media images. And I’m telling you first-hand, it works!

    Step 1: Choose Your Tools

    Every good artist or craftsman needs to have good tools. And there are different tools for different jobs. Furthermore, there are different tools for different people for different jobs.

    You may not feel as comfortable with some tools, but thrive with others. That’s okay. The key is to find the tools that work best for you.

    For the sake of time, I’m going to stick to the three tools that I believe are the most effective for different reasons and use cases.

    • SoVisual.co: Simplest to use.
    • Canva: Moderate ease of use, moderate control.
    • Photoshop: Hardest to use (if you’re not experienced), maximum control.

    For more tools take a look at my list of desktop tools and mobile tools for image creation.

    The above-mentioned tools will work for the majority of people’s needs, so I recommend giving them all a try and seeing which one you feel most comfortable with.

    Step 2: Decide the Content


    What are you going to put on the social media image? Will it be quote? Will it be the title of a blog post?

    Or in other words, what is the message you’re trying to get across?

    You need to know what your content is going to be first and foremost because the point of a good visual, above all else, is to communicate a message.

    But knowing the content isn’t the only thing you should have in mind. You also want to know and understand the emotional tone behind it.

    Understanding the emotional tone will help you sort more quickly through some of the elements that will go into creating the visual such as:

    • Typography: Certain fonts will communicate different emotional tones
    • Color: Colors communicate to our brain and can instantly put the viewer in an emotional state
    • Imagery: The photos or dominant graphic(s) you use can have a significant effect on the tone

    Know your message, know the tone you want to set, and then proceed to the next step.

    Step 3: Source the Images

    If you are going to add imagery as a background or visual accompaniment to the message, you will want to have a handful of go-to resources to find and discover images.

    You can of course use one of my top sites to find free images post. I also recommend using your browser’s Favorites or Bookmarks feature to save your preferred places to sources images.

    A few tips to keep in mind when sourcing your images:

    • Remember the tone of your message (as I said above) and make sure the image you use connects in some way.
    • Always make sure the image you’re using is legal to use— don’t just use any old image you find on Google search.
    • Make sure the image you source is a minimum of 2000px wide and 1080px tall. More on this later.

    It’s really easy to find yourself spending an hour just looking for the “perfect” image. This can be a huge time-suck. And the next time you need to create an image, you’ll dread it because you’ll remember how time-consuming this part can be.

    So set that time limit (10 minutes) and decide that you will find an image in that amount of time.

    Step 4: Put it Together


    Using the basic rules of visual content creation, it’s time to make your graphic piece. This is where the real work begins.

    To get the most bang for your buck (so-to-speak) you need to create a minimum of 3 sizes for this image:

    • Landscape (1200×630)
    • Portrait (1080×1350)
    • Square (1080×1080)

    But if you have the extra time and energy, I also recommend making a 1920×1080 version. This is the perfect 16:9 ratio image that has the most universal visual appeal. The only places it can’t be used are as a Facebook Open Graph image and on Instagram. Everywhere else online, it works like a charm.

    Now, it also helps if you have already gotten your hands on some social media image templates to make this process more streamlined. While 2/3 of the tools I will talk about below will have templates for you, it’s still good to have your needed sizes in mind.

    Using SoVisual.co

    SoVisual.co is the newest visual content creation tool on the market. It offers the simplest (and fastest) process for creating images. However, it also offers the least amount of control over the creation process.

    That’s not necessarily a bad thing.

    SoVisual.co gives you access to a huge library of professionally made design templates. You browse through the feed, select the design you like, and then you can customize the content. You can customize:

    Once you’ve done that, you can instantly have the app crank out 3-5 different sizes made to cover all your bases in social media. That is where this tool really shines.

    By automatically taking care of the primary design elements and resizing for each network for you, you save a ton of time.

    The drawback is you have less control over modifying the size of text, spacing, positioning and other design elements. If you’re just looking to get the job done and not fiddle with tiny details, this is probably the best tool for you.

    Using Canva


    This is like the best of both worlds tool. Canva gives you all the tools you need to customize your image without being overwhelming.

    You can start with one of their size templates and then chose from their professionally designed layouts. Once you pick a layout, you can customize pretty much everything about it.

    Now, you don’t have as many fine-tuning design controls as you would with Photoshop, but that is both a strength and a weakness of the tool. Enough to do what you want, but not enough to suck you into a black hole of options exploring and tweaking.

    However, unless you have Canva for Work, you will not have the ability to automatically resize images for all your social media needs. The free Canva user will need to create each size image separately.

    This can be a lot more work. If you’re going to be creating a lot of images for social media, then Canva for Work is definitely worth the cost.

    Using Photoshop

    If you’re using Photoshop, you have a full suite of design tools to fine-tune and customize your images to every last detail. It is the most popular design standard software used by professional designers for decades.

    However, unless you have been using Photoshop for a while, you may get overwhelmed by how many options. The learning curve is quite steep and it could take you a year or so working with it to get comfortable and quick.

    Now, using Photoshop there is a trick you can use when creating your social media images.

    A while back I discovered the glorious world of Photoshop scripts. Basically, if you’re familiar with javascript you can create scripts that will automate certain things in Photoshop.

    One particularly helpful script I discovered is called Duplicate to All and it allows you to select a layer and have it duplicated (pasted) to every open file.

    So here’s how this workflow works:

    • Open 4 separate photoshop templates (mentioned above).
    • Create the image on the biggest template (1920×1080).
    • Once finished with that one, put all layers into a group and use the Duplicate to All script to place that group on all templates.
    • Tweak the layers on each file to make it line up correctly for each different template.
    • Save each template separately (JPEG and PSD versions).

    This might actually seem like more work, but I’ve found it to be a much better workflow. You not only get better results, but you have a PSD for each version so you can always reopen if you need to make changes.

    Step 5: Optimizing Images

    There are two things that we need to talk about when optimizing your images. The first is pretty obvious to some, but the second may not be.

    • File size optimization
    • Search engine optimization

    Both of these steps are a crucial part in making sure your images are giving you the greatest return on investment.

    Image File Size Optimization

    Everyone knows that a slow loading page is not ideal for user experience. It’s also bad for SEO. So when adding images to a blog post or page, you want them to be as lightweight as possible without losing image quality.

    Even if you’re only planning on sharing these images on social media, you still want to optimize them to be as lightweight as possible. Why?

    When you upload an image to a social network, they are going to optimize it themselves. If your image file size is massive and unoptimized, the more the network will have to do in order to reduce its size and loading time. And you can’t always trust them to preserve the image quality that you’ve worked so hard on.

    Facebook is especially brutal when it comes to image quality loss.

    So do some of the work up front and you’ll save as much quality loss as possible.

    Reducing File Size with Photoshop

    If you’re using Photoshop, you have a bit of control in reducing the file size when you “Save for Web and Devices”.

    Your first step is to choose between saving as a JPEG or PNG. Depending on the image, one may be better than the other. So first select PNG and take a look at how big the file size will be. Then switch to JPEG and see what the file size will be.

    With JPEG selected you can also tweak the quality settings to reduce the file size further. I don’t recommend going below 70% or else you will likely see a visible degrading of quality.

    After looking at these settings, choose the file type that has the lowest file size.

    Other Tools to Reduce File Size

    There are plenty of apps, plugins and web services that will help you reduce your file sizes even further. Here are some recommended tools:

    Personally, I use JPEGmini and that’s all I need. If you’re not a Mac user though, this will not be an option for you.

    Image Search Engine Optimization

    Many people overlook this step because they simply aren’t aware of how powerful it can be. They also don’t realize just how big a problem it is to have poor image seo.

    Trust me, optimizing your images for search can not only improve your overall search ranking, but can drive traffic as well.

    This, of course, only applies if you’re loading them on your blog, but it’s a good habit nonetheless.

    Optimize Your Filename

    First, be sure that your filename contains a descriptive keyword or phrase that summarizes the image. So if your image is a meme of Yoda, name it something like yoda-choose-meme.jpg.

    Don’t make it super long, just enough to get the job done.

    Add the Alt Tag

    The Alt tag is primarily used by screen readers for the visually impaired. This is is meant to describe the image in a useful way to someone (or something) that can’t actually see the image.

    In WordPress it’s very easy to set an Alt tag when you upload an image. Do this every single time. No exceptions.

    This is not only good for the visually imaired and search engines but if anyone happens to pin this image, that Alt tag is what Pinterest will automatically fill the Pin description with.

    Keep your alt tag to 125 characters or less. This can be a bit more descriptive than the filename but not a full-on description.

    If you’re not using WordPress, you can use HTML in your editor of choice, here’s what that would look like:

    <img src="IMAGE URL" alt="YOUR ALT TAG HERE" />

    And no, it should not be in all caps. I did that just so you can easily see where it goes.

    Write Your Title tag

    Just like the alt tag, the Title tag is easily overlooked. This is what will show up when someone hovers their mouse over your image and they get that little popover bubble.

    Again, WordPress makes this very easy to add, but if you’re using something else or doing this manually through HTML, here’s what it would look like:

    <img src="IMAGE URL" alt="YOUR ALT TAG HERE" title="YOUR TITLE TAG HERE" />

    Your title tag should also be in title case— first letter of each word Capitalized, just like the title of a blog post. And also, just like a good blog post title, try to keep it to 60 characters or less.

    For a more in-depth look at Alt tags and Title tags, Yoast has a fantastic article that I highly recommend.

    Conclusion

    Getting your content to stand out in today’s dizzying overload of content doesn’t take much. You just need to have a little more insight and be willing to do a little more work than the next guy or gal.

    Knowing these simple social media image optimization and workflow tips will help you begin cranking these things out with greater effectiveness and the highest possible efficiency.

    As a recap, here’s what you need:

    • Pick the image creation tool that works for you
    • Decide on the content
    • Source the images or primary visual aids
    • Put it all together (using your tool of choice)
    • Optimize the file name
    • Optimize the file size
    • Upload the image
    • Add alt tag (if applicable)
    • Add title tag (if applicable)

    Once you’ve done this a handful of times, it will be like second nature. Done consistently over time, this can be a highly impactful strategy for getting your content discovered by a much wider audience.

    So which image creation tool is your favorite? Is there anything you read above that was completely new to you? You can leave a comment by clicking here.

  • Warning: Sharing That Image Could Get You Banned

    There is a great deal of misconception when it comes to finding and sharing images online. The large majority of people sharing images online are doing it wrong. They have no idea that the way in which they are sharing them can actually get them banned, blacklisted or even prosecuted in a court of law!

    Not only that, but those of us who understand the best practices notice when someone is sharing without regard to copyright or attribution. This can hurt your online reputation and mark you as a bad internet citizen.

    Have no fear because in this post I’m going to cover everything you need to know about the legal side of sharing images online.

    If you want to skip past the legal mumbo-jumbo and go straight to the How to part, click here. (I don’t recommend skipping the legal mumbo-jumbo though. I’ve spent a lot of time making it very simple and it’s always good to be more educated on a subject as highly complex as this.)

    This is part of the Essential Guide to Sharing Images Online Series. Be sure to catch all the posts in this series!

    Destroying the Myths

    There is a great deal of misinformation and gross misunderstanding about image sharing. The good folks over at Legal123 have created the infographic below which tackles the 5 greatest myths.

    copyright infringement infographic

    Key takeaways from the infographic:

    • No matter what you see other people doing, just because it’s on the internet doesn’t mean you’re free to share it.
    • Just because you give someone else credit or attribution doesn’t mean you’re free and clear.
    • Just because you’re not making a profit from it doesn’t make it right.

    Bottom line– unless the owner or creator of the image has clearly stated that the work is free to use and share, you don’t have the right to use it. Period.

    An Example Most of Us Can Relate To

    We’re specifically talking about images in this series but to give a parallel example that we are all familiar with, allow me to take you back to grade school.

    Do you remember your teacher telling you that it is wrong to copy someone else’s work and pass it off as your own? We’ve all gotten the plagiarism talk in one form or another right?

    Well imagine that I’m surfing the internet and I come across a quote in a blog post that I think is really good. I decide I want to share it out to my social networks. So what I do is copy the quote and just paste it into a new Google+ post with no link to the source and no citation of the author.

    That’s plagiarism right? And that’s not something honest people do right? Okay good. So why would it be okay to copy and paste someone else’s image and share it without giving them credit?

    Now when it comes to works such as images, it’s crosses the line quickly from just plagiarism to being copyright infringement. What most people don’t know is that violating copyright in this manner can actually get your social media account deleted without notice.

    That’s right– deleted. Without notice. All it takes is for one copyright owner to file a complaint and goodbye Google+, Twitter, or Facebook account! Or worse, if you’re using copyrighted images without permission on your website or blog, enough complaints can get you blacklisted by search engines.

    Or worse yet, you can be taken to court! This is rare, but still a possibility if you’ve made a large amount of violations.

    So bottom line, share responsibly. How do you do that? Well I’m glad you asked!

    How to Share Images Online Responsibly and Legally

    1. Search for Images that are Free To Share

    When you go to search for a sharable image, be sure that part of your search criteria is that the image is free to use and shareI’ve created an extensive list of free image sites just for this series.

    You can use Google image search to help you with this as well. Just hit the gear icon (shown below) and click on Advanced search. Then you can scroll down to the Usage rights section and select the Free to use and share option.

    Google image searchGoogle image search 2Google advanced image search

    2. Look or Ask for Permission

    There are some artists or photographers who are okay with people using their images as long as they give proper attribution. They will make it clear somewhere on their website that they are perfectly okay with people using their photographs as long as a link is provided back to the original. Trey Ratcliff is a great example of this– see his Licensing page here.

    So before you grab an image from a website, take a minute to search for their policy on the use of their images. If you cannot find an obvious policy, contact the creator and ask permission.

    I’ve been asked permission on many occasions by folks who want to use my images in presentations and such. You know what my response is every time? “Sure! Thanks for asking!”

    Most artists don’t mind that you want to share their work, but they want to maintain some degree of control and attribution. By respecting their work and asking permission, you may also make a friend in the process.

    I’ve done this with several photographers and have always gotten a positive response.

    Let’s Make the Internet A Better Place

    share images responsibly

    [Cue the warm and fuzzy inspirational music.]

    Look, people will always take and steal other people’s work and pass it off as their own. In fact right now, this blog post and the images in it have probably been copied and pasted into a dozen spam sites, and I haven’t even hit Publish yet. It’s that big of a problem.

    But you can make a difference. If you resolve to share responsibly, to be a good internet citizen, to give credit where credit is due and to stop supporting those who are knowingly (or unknowingly) stealing other people’s hard work, we can make a better internet. Set the example, rise above the standard, and it will always come back to you for the better!

    In my next post in this Sharing Images Online series I have given you my best places to find free images online to use and share.

    Until then, what questions do you have regarding the legality of sharing images online? You can leave a comment by clicking here.

  • Online Image Terminology That You Need to Know

    What is a meme? How do you pronounce gif? What is considered an infographic? What’s the difference between a gif and a cinemagraph?

    As we begin to take a deep dive into the complex world of sharing images online, I thought it was important to first go over online image terminology. I want us to be able to communicate more effectively, or at least have a reference point when we are talking about the different types of images that are shared online. This will make our conversations more effective and make you sound like the super-savvy online rock star that you are.

    Think of this post as your official online image terminology dictionary. (Say that five times fast!)

    There are many different types or formats of online imagery. Below I have identified the most commonly shared formats and even introduced a couple new words that help to classify image types that have yet to find their own name.

    This is part of my Essential Guide to Sharing Images Online series. You can view the rest of the posts in this series here.

    Photo

    The most common image type is the classic photo. This is a static (non-moving) image captured with a camera. It is not engineered by a graphic artist from scratch— this is a real life capture from the real world. It may have had some work done to beautify it, but the subject matter is taken through a camera lens.

    For example:

    Hang in there folks, we gotta start with the basics!

    Gif

    A gif (pronounced like JIF, the peanut butter brand— not as in “gift” without the ’t’) is an image format that allows for animation. It gives the ability to make “moving” images that play in an infinite loop. (via Wikipedia) A gif can be static, but the format is most commonly used to make animations.

    For example:

    Animated gifs seem to be quite popular and tend to get a lot of social shares when they are humorous. [Image credit: SBNation]

    And just so we’re clear, the proper way to pronounce GIF is with a soft ‘g’ sound. As in gin, giraffe, and general.

    Cinemagraph

    Cinemagraphs are still photographs in which a minor and repeated movement occurs. Cinemagraphs, which are usually published in an animated gif format, can give the illusion that the viewer is watching a video. (via Wikipedia)

    For example:

    These are like the high fashion form of gifs. Great ones can be completely captivating, or really creepy like this one:

    [Image credit: Cinemagraphs.com]

    Selfie

    A selfie is a type of self-portrait photograph, typically taken with a hand-held digital camera or camera phone. It’s also one of the most overused words of 2013.

    In most cases it’s customary to make a strange, duck-like face when taking a selfie, however not making that face won’t disqualify it as a selfie.

    For example:

    Notice I have refrained from making said duck-face. I refuse.

    Meme

    meme [mēm] (noun) a humorous image, video, piece of text, etc. that is copied (often with slight variations) and spread rapidly by Internet users. (As defined by Google.)

    For our purposes we’re focusing on the “image” application. A meme is most commonly recognizable by having a big white-text caption over top of an image that is meant to be humorous.

    For example:

    And in case you want to take a stab at creating your own, SoVisual.co has an entire category for meme templates that are insanely easy to customize.

    Infographic

    in·fo·graph·ic [infōˈgrafik] (noun) a visual image such as a chart or diagram used to represent information or data. (As defined by Google.)

    Now I often see people referring to any type of graphic with words on it an infographic. I don’t think that’s an accurate representation of what an infographic should be. In my opinion, an infographic is any graphic image which communicates multiple data points in a visual manner.

    For example:

    Infographics are one of the best ways to communicate interesting data in a way that people will actually enjoy reading. They’re highly sharable (especially on Pinterest) and when done right can be one of the best forms of content marketing.

    Oh, and by the way— it just so happens to be one of the things I love doing. Feel free to contact me here to learn more.

    Infogram

    An Infogram is a completely new or concise part of an infographic that works as a standalone piece of content. (defined by NeoMam)

    For example:

    how to brand your pins

    This is a great way of repurposing an infographic for different mediums that may not support very long [tall] images. It can serve as a snapshot (or Headline Graphic) or as part of a slide show.

    Headline Graphic, Title Graphic, Feature Image, Hero Image

    For every blog post I write, I create one of these types of images. They’re called different things by different people and for all intents and purposes each of the names listed above works just fine.

    These images are created with the explicit purpose of being a visual headline for a blog post, article, or webpage.

    For example:

    choose brand colors with paint samples all over a desk

    [Scroll back to the top of the page and see what I’ve done for this post.]

    This is a great way to draw attention to a social media post that is promoting a blog post. Visuals will elicit far more engagement and click-through than just a stand alone text post. I’ve done significant testing of this on Google+ and found sharing images always yields more engagement.

    Quote Graphic

    Quote graphics are those insanely popular and highly sharable images you see flood your Google+, Facebook, and Pinterest streams. Simply put, it’s a quote that has been created as an image.

    For example:

    fonts quote

    Although the internet seems to be flooded with these types of images, the ones that are done well can gain a lot of exposure very quickly.

    And there you have it

    So now that we’ve got some basic online image terminology covered, we can start breaking down specifics on sharing legality, curation, creation, optimal dimensions and non-suckification. Stay tuned for the next part in the Essential Guide to Sharing Images Online series.

    In the meantime, are there any formats that I’ve left out? Would you add/take away anything from the definitions above?