A handful of tips I’ve learned about successful Periscope broadcasts.
It’s only been a handful of months since Periscope was launched into the public and already it’s gained great momentum. With this new surge of buzz around live-streaming, now is a good time to evaluate whether or not it’s right for you.
If you’re a brand, @VincenzoLandino has written a great article on how to know if Live-streaming is right for you.
If it is right for you, or you at least want to try it out, I want to help shorten your learning curve. I want to jump you ahead of the class with my best Periscope pro tips— some of which the most successful people on Periscope haven’t figured out yet!
I’ve broken these tips into 3 phases of your broadcast:
- Pre-broadcast
- In-broadcast
- Post-broadcast
Or in other words this is everything you should consider for before, during and after you broadcast on Periscope. I’m not going to cover the basics of getting started, so if you’d like to start there my buddy Blake Croft has created a Quick Start Guide to Periscope you can take a look at.
So let’s just dive in.
Pre-Broadcast
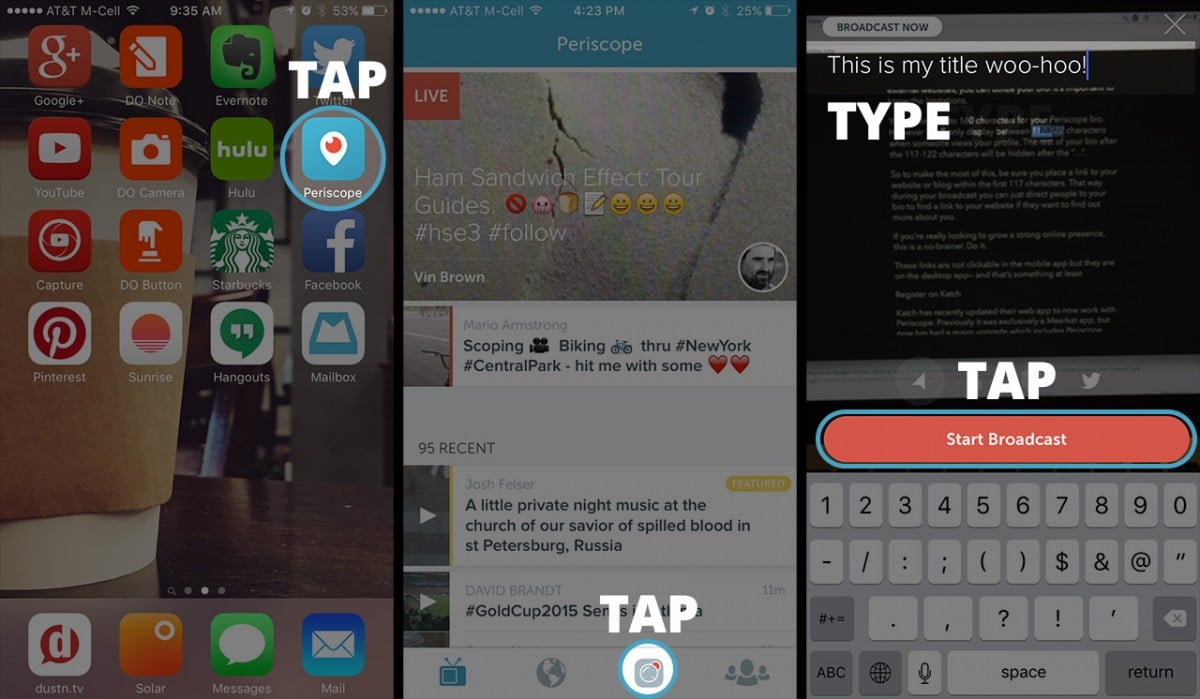
Periscope is super simple. You can just open up the app, hit the camera icon, type a title and hit Broadcast.
But if you really want to have some extra “awesome” behind your broadcast, you’ll want to make sure you’ve taken the following into consideration.
Add your URL in your bio
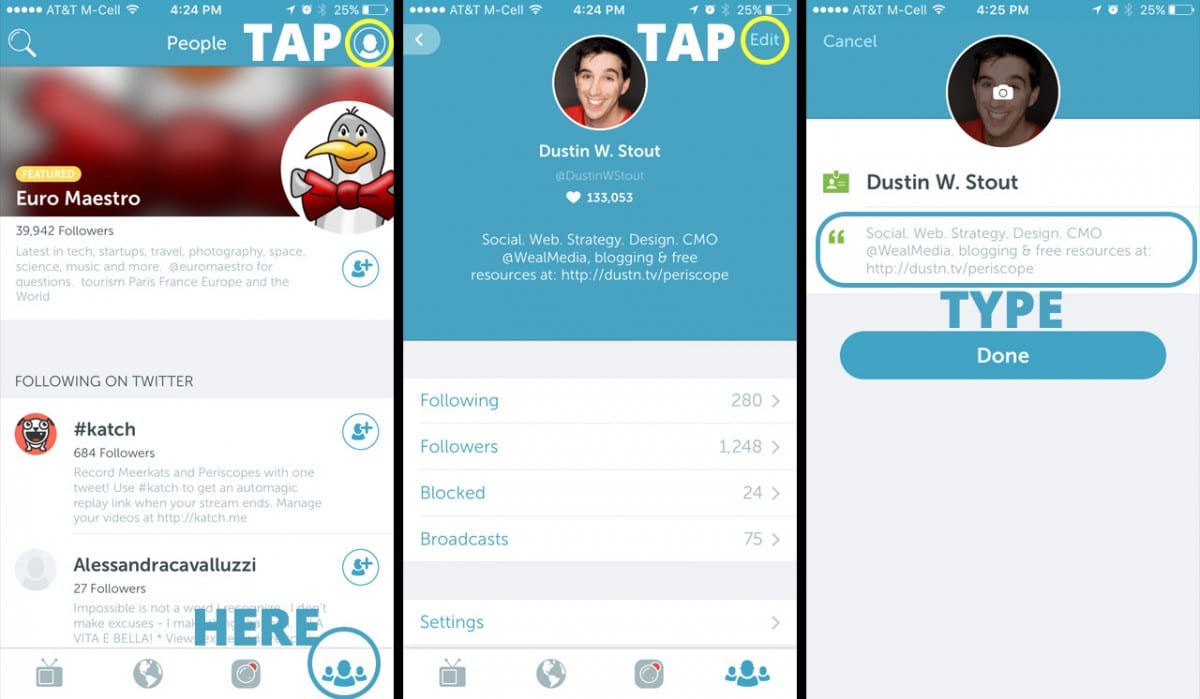
Since Periscope doesn’t have a spot for you to add a link to external websites, you can utilize your bio. It’s important to know the limitations.
You are limited to 160 characters for your Periscope bio. However it will only display between 117-122 characters when someone views your profile. The rest of your bio after the 117-122 characters will be hidden after the “…”.
So to make the most of this, be sure you place a link to your website or blog within the first 117 characters. That way during your broadcast you can just direct people to your bio to find a link to your website if they want to find out more about you.
[clickToTweet tweet=”#ProTip: Add your website URL to your #Periscope bio. This is HUGE!” quote=”#ProTip: Add your website URL to your #Periscope bio. This is HUGE!”]
If you’re really looking to grow a strong online presence, this is a no-brainer. Do it.
These links are not clickable in the mobile app but they are on the desktop app— and that’s something at least.
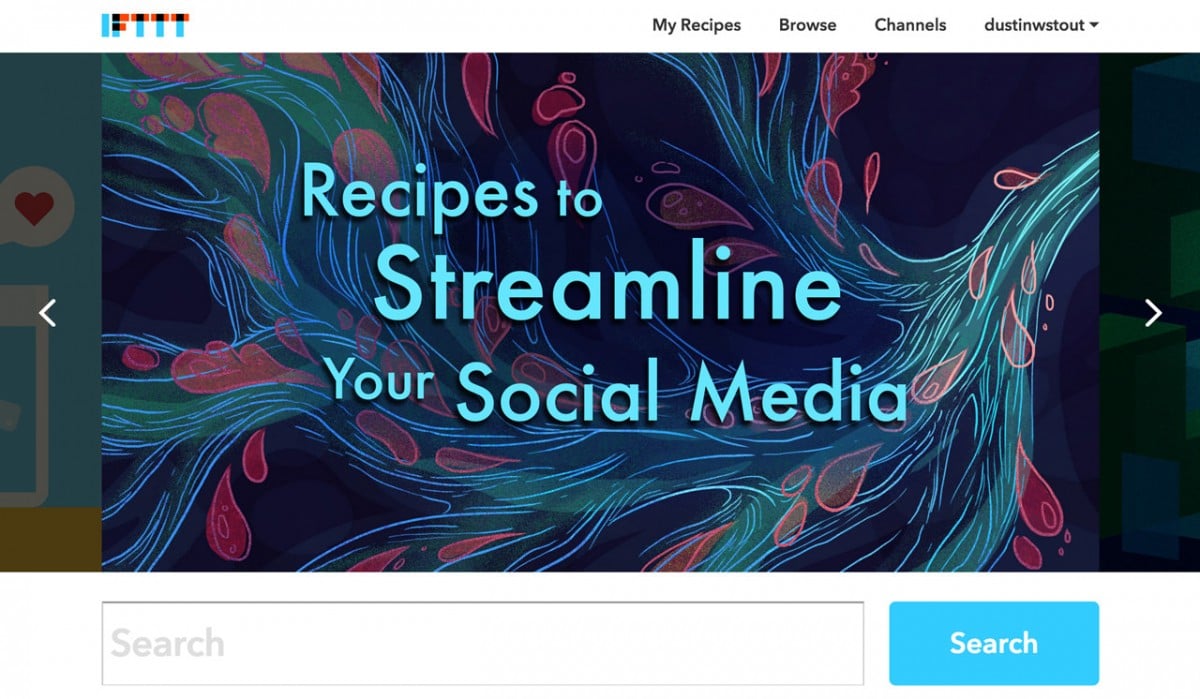
Set up some IFTTT recipes
The only social network currently integrated with Periscope is Twitter. Which makes sense, because Twitter owns it.
For those of us who are a bit more “connected” than that and want to spread our Periscope broadcasts to other platforms, we need to find an easy solution to ake it happen.
With IFTTT you can connect many of your social channels including (but not limited to):
- Buffer
- App.net
Obviously with Buffer and App.net the possibilites are greatly expanded since they both have more social channels that can be connected. There are dozens of other channels that you could potentially connect to in order to help distribute your live streams further, automagically.
Here’s the recipe I use for Facebook:
This says that whenever I tweet something with the hashtag #Periscope it will be automatically shared to my Facebook profile with the link to the broadcast. Since Periscope automatically posts a “Live on #Periscope” tweet with a link to your broadcast when you begin, this then gets automatically shared by IFTTT on Facebook if you’ve activated this recipe.
Be aware though that this also means if you share someone else’s broadcast on Twitter that it will get picked up by the IFTTT recipe as well. So you may want to change the hashtag in the recipe to something more custom and then just be sure to add that hashtag yourself to your broadcast titles.
Big thanks to @iSocialFanz who helped me to figure this one out!
Give IFTTT a look and see if there are any channels you can use to help expand the reach of your broadcasts.
[clickToTweet tweet=”#ProTip: Use @IFTTT to automatically share your #Periscope broadcasts to Facebook!” quote=”#ProTip: Use @IFTTT to automatically share your #Periscope broadcasts to Facebook!”]
Precompose headlines in twitter
You are allowed to have up to 120 characters for your broadcast’s headline. But when your broadcast gets tweeted out not all 120 characters will be shown.
“LIVE on #Periscope: “ will automatically be added to the tweet about your broadcast which is why they wont let you use the full 140 characters that Twitter normally allows. But on top of that the link to your broadcast will take up another 22 characters leaving you with only 97 characters for your headline.
That’s plenty to work with. Especially considering headlines can include emoji.
So if you really want to take the guess work out of making sure your headline is the right size, my advice is to compose your headline first in Twitter. Make sure that your headline leaves at least 43 characters left in the Twitter compose box then copy and paste it into your Periscope headline.
[clickToTweet tweet=”#ProTip: Precompose #Periscope headlines in @Twitter to maximize your characters!” quote=”#ProTip: Precompose #Periscope headlines in @Twitter to maximize your characters!”]
Your opening shot
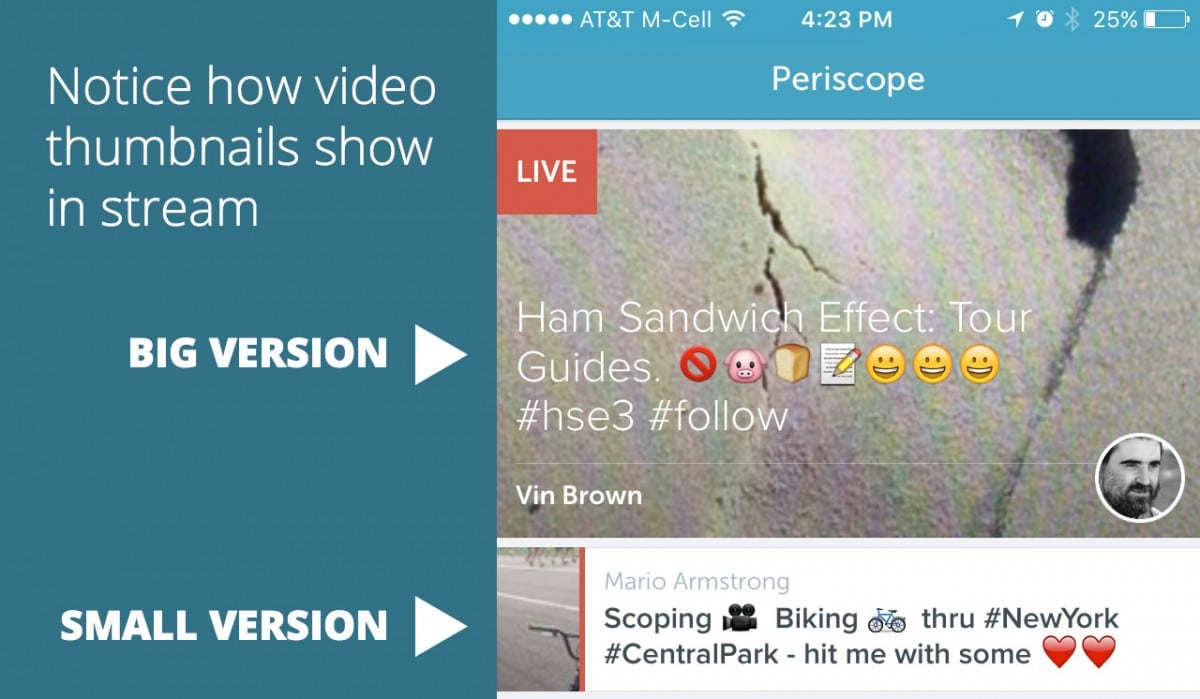
When you first hit the broadcast button whatever your camera is pointed at will then become the video thumbnail preview for your broadcast. So just be aware that this is what people will see when they see your broadcast in their stream.
You’ll also notice that it’s the rear-facing camera that is active when you begin the broadcast, and you cannot change this.
My suggestion is to utilize this as an opportunity to add some visual allure or context. Try one of these ideas:
- Show your website homepage (my favorite)
- Show a hand-written note
- Show a graphic of some sort (Donna Moritz does this well)
- Show your face (Blake Croft does this often)
Doing this will make your broadcast stand out in the feed from all the compltely random screenshots of people who don’t realize this little quirk.
[clickToTweet tweet=”#ProTip: Your opening shot when you hit Broadcast is what will be seen in the #Periscope stream.” quote=”#ProTip: Your opening shot when you hit Broadcast is what will be seen in the #Periscope stream.”]
Have something to say
There’s nothing more annoying than jumping into a broadcast where all the person is doing is saying “ask me questions”. If you don’t have direction or some type of point to make— don’t broadcast.
Sure, the occasional “Ask me anything” is fun, but you can only do that so many times before people get bored. Your audience is not there to entertain you, they’re there to recieve something of value.
Having something to say, and training your audience that you always have something to say will produce a loyal audience who keeps coming back for more.
[clickToTweet tweet=”#ProTip: Never hit Broadcast on unless you have something of value to say. #Periscope” quote=”#ProTip: Never hit Broadcast on unless you have something of value to say. #Periscope”]
In-Broadcast
These are all the things you want to be aware of during the broadcast.
Give them some time
When you first go live, it may take some people a few seconds to:
- Get the notfication you’re live
- Leave whatever app they’re already in
- Launch the periscope app
- Get a stable stream to finally see/hear you
So one thing you can do is start your broadcast with a bit of context— small talk letting people know where you are, what you’re doing. I like to do somthing to the effect of:
“Hey everyone it is about 10:15 here in sunny SoCal. I’m on my fith cup of coffee for the day and boy am I wired! As you’re coming in, let me know where you are!”
Then you can begin to start introducing your point or the reason you’re broadcasting.
Encourage sharing
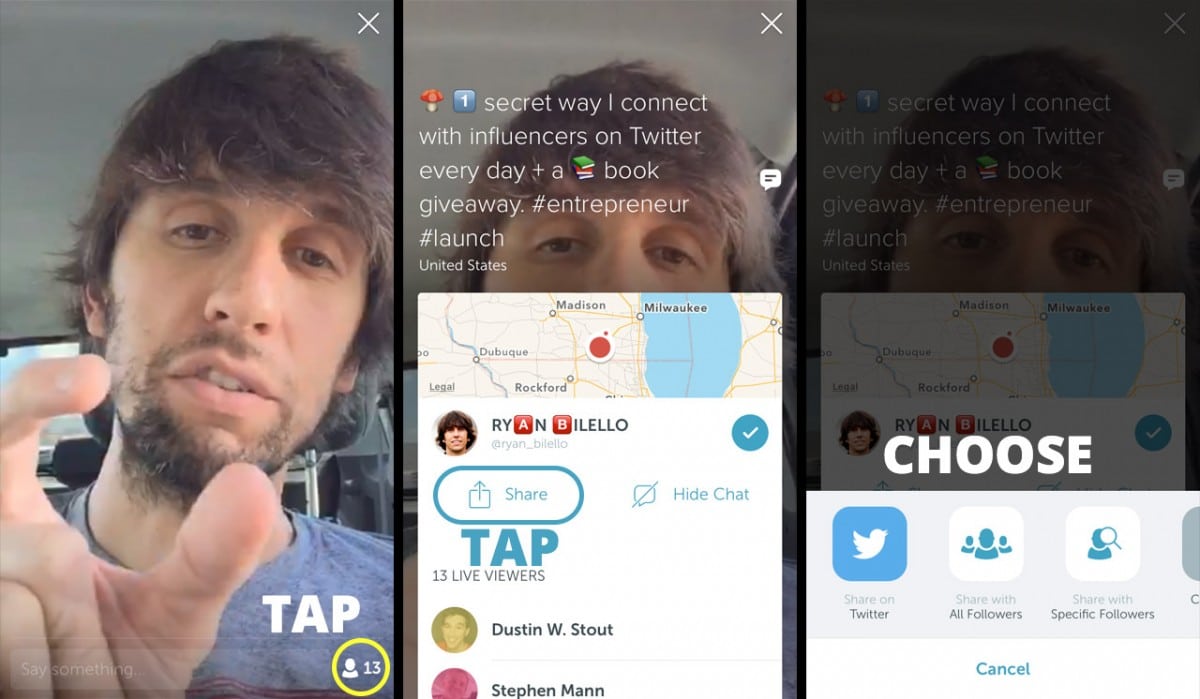
[HT to @Ryan_Bilello for allowing me to capture these screenshots.]
After I’ve explained what I’m going to be talking about, I ask users to tap the people icon and share with their followers if they think others will be interested. I know you think you’re that good and that people will automatically share without you having to ask, but it never hurts to remind people to share.
And it’s proven to be highly effective.
[clickToTweet tweet=”#ProTip: Encourage people to share– sometimes that’s all they need.” quote=”#ProTip: Encourage people to share– sometimes that’s all they need.”]
Stay in frame, and no nostrils
This might be a no-brainer to some, but I couldn’t just leave this out.
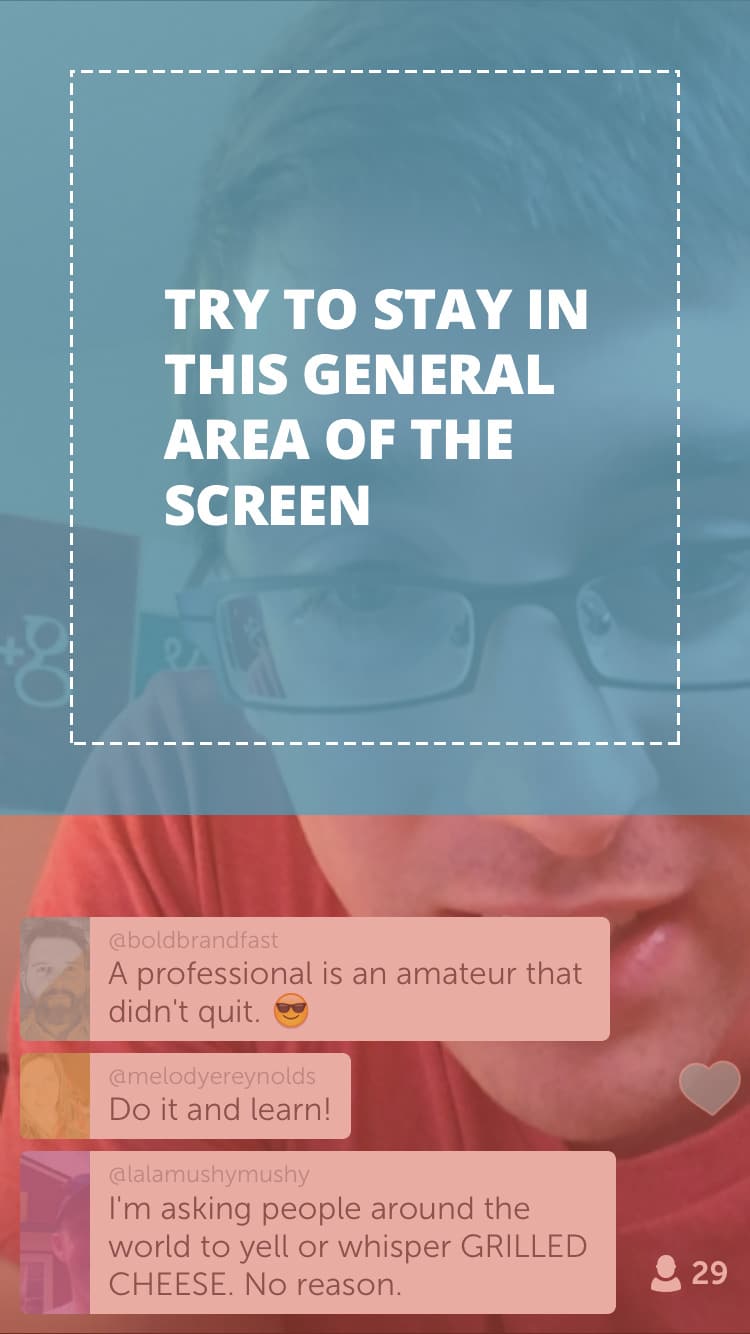
You want to make sure that your head is in the center of the video. If you position yourself too low then you’ll get covered up by the comments and people wont be able to see your face.
But you also want to be sure that your camera is either parallel to your eyes or slightly above your line of sight. It’s better to be looking up at the camera than for the camera to be looking up your nose.
Don’t nobody wanna see that.
[clickToTweet tweet=”#ProTip: Keep your camera at eye-level or above. Nobody wants to look up your nose. #Periscope.” quote=”#ProTip: Keep your camera at eye-level or above. Nobody wants to look up your nose. #Periscope.”]
Post-Broadcast
Resist the temptation to go about your business and do a little follow up. It can go a long way with your audience.
Firstly, grab your stats
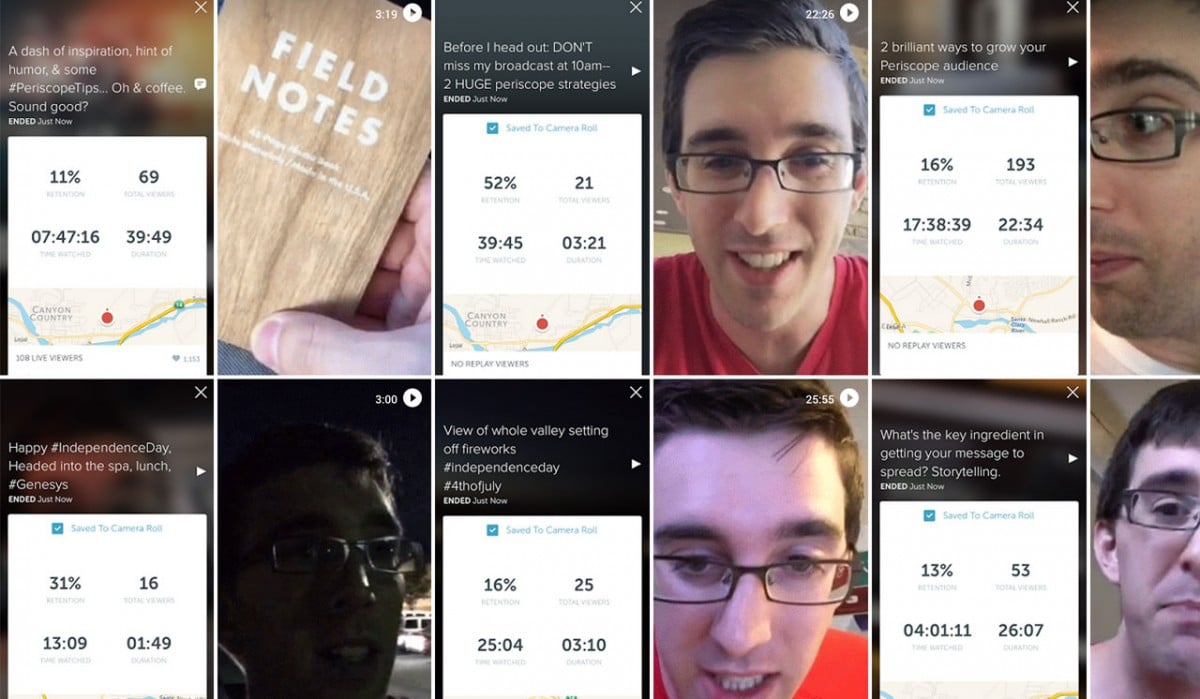
When you end your broadcast you’ll be presented with the stats. What I like to do is scroll them up into full view and then take a screenshot. This way it shows up right next to the video in my phone’s camera roll and I have a record for future reference.
Once you’ve done that…
Upload to Google Photos (or cloud storage of your choice)
Since video takes up a lot of space on your phone, you’ll want to upload these videos to the cloud storage platform of your choice immediately. I like Google Photos, but you can also use Dropbox, iCloud or whatever else works for you.
I take it a step further and I add both the broadcast and the screenshot that I took afterwards to an album called Periscope Broadcasts. I can then go back and chronologically see what I broadcasted about and how my stats have improved.
Follow-up with commenters
The people who are engaging on your broadcasts are crucial in growing your platform further. You need to treat every single commenter as a valuable advocate and do all you can to develop an on-going relationship with them.
Take note of some of your most engaged commenters and be sure to follow them and pop in on some of their live videos.
Follow-up is a must if you really want to cultivate a community of people who love and share your stuff.
[clickToTweet tweet=”#ProTip: Follow your commenters on #Periscope. These relationships matter!” quote=”#ProTip: Follow your commenters on #Periscope. These relationships matter!”]
Schedule out your replay
Your broadcast will live on Periscope for 24hrs. This adds a bit of urgency to anyone who might want to hear what you had to say. So what you can do is use a tool like Buffer or Hootsuite to schedule out a reshare of that link from your initial broadcast letting people know it will only be available for X more hours.
[clickToTweet tweet=”#ProTip: Use the time-sensitive urgency of #Periscope to reshare your broadcasts via @buffer. ” quote=”#ProTip: Use the time-sensitive urgency of #Periscope to reshare your broadcasts via @buffer. “]
Learn, Rinse and Repeat
You should always be learning— nobody is perfect and there’s always room to improve. Pay attention to:
- What broadcasts tend to do really well?
- What times of day seems more active?
- What type of content resonates most with your audience?
- Who are the people showing up again and again to your broadcasts? (Reward them!)
This live streaming revolution that is taking place offers a huge opportunity to those who get started right away and learn everything they can. You may be awful at first, but that’s okay— just get started and get better.
For further reading, my buddy @RyanSteinolfson has a great video about the tools he uses to get more followers on Periscope.
If you focus on delivering valuable, interesting and/or entertaining content you will thrive!
Did I miss anything? What would you add to this list of pro-tips? Leave a comment below!


Leave a Reply
You must be logged in to post a comment.